Let’s get started
Simplify Your Website Accounting with 1-Click or AutoSync!
Active License
Activating License with BizSwoop
Step 1: Install and Active Plugin App on WordPress
- Download from Order & Upload the WooCommerce QuickSync plugin to the /wp-content/plugins/ directory or Add New on the Plugins page and upload zip file to your WordPress website.
- Once the Plugin is uploaded by FTP or Add New zip file from the Plugins section.
- Go to Plugins installed in the WordPress admin, Click Activate Plugin to activate WooCommerce QuickSync plugin.
- On the WooCommerce menu, a new menu item will be created labeled QuickBooks.
Step 2: Activate WooCommerce QuickSync License with BizSwoop
- Click the QuickBooks menu item under WooCommerce.
- Click the Settings tab on WooCommerce QuickSync
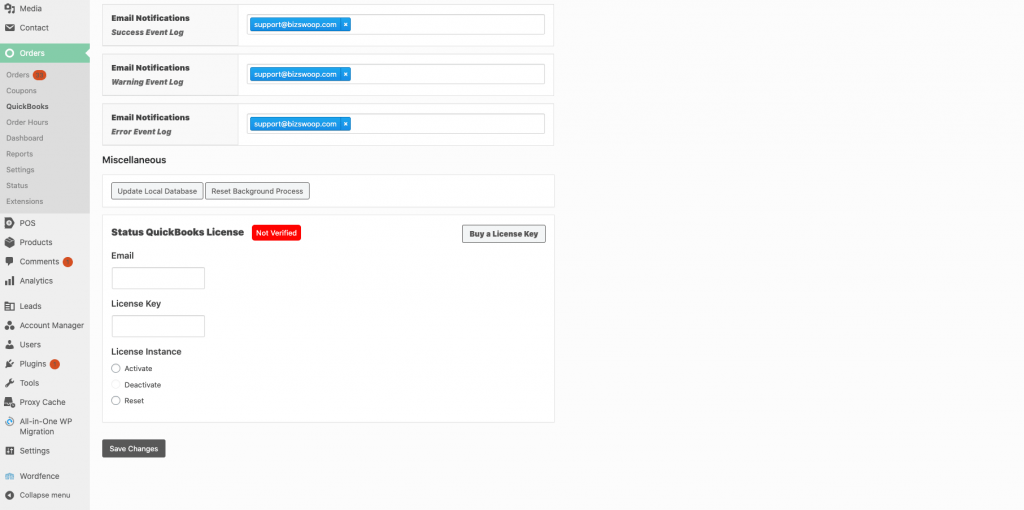
- Scroll down to section Status QuickBooks License
- From the order, enter your Activation Email and License Key
- Select the Activate option, click Save Changes
- WooCommerce QuickSync is no Activated!
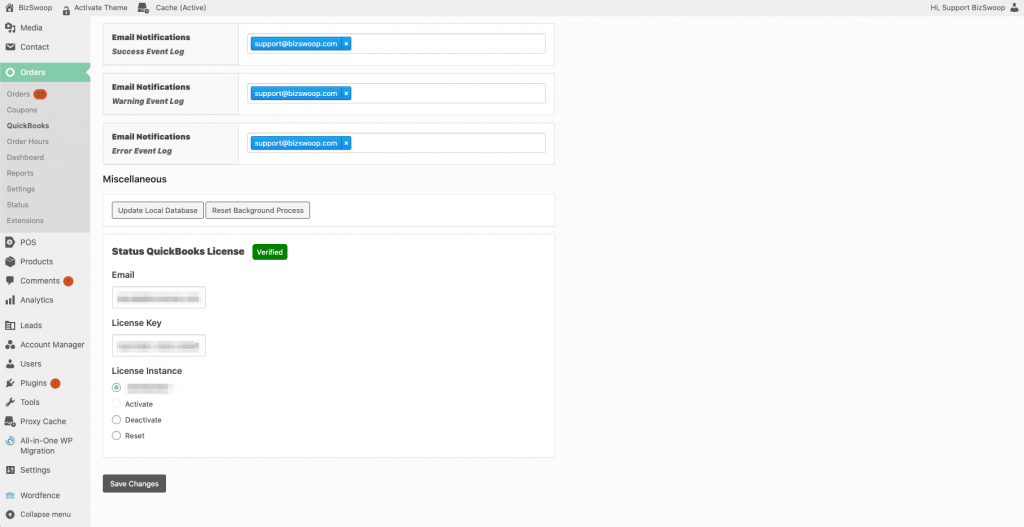
Connect to QuickBooks
Connecting to QuickBooks Account
Step 1: Get Client ID and Client Secret
It’s easy. Quick steps to get the ID and Secret
Step 1: Sign In to your Intuit Developer Account here
Step 2: Create New APP on the Dashboard here
Step 3: Enter App Name(eg. Invoice Sync) and Select “Accounting” Scope and Create APP
Step 4: Go to Product Keys & Oauth ,if you are using QuickBooks sandbox then copy Development key otherwise copy Production Keys.
Note: You might need to complete account verification and Eula settings on your account to finish the app setup steps on Step 5.
Step 5: Enter Redirect URI found under the Accounts Tab
Note: This is the Redirect URL on your WooCommerce website and under the Accounts tab of the WooCommerce >QuickBooks
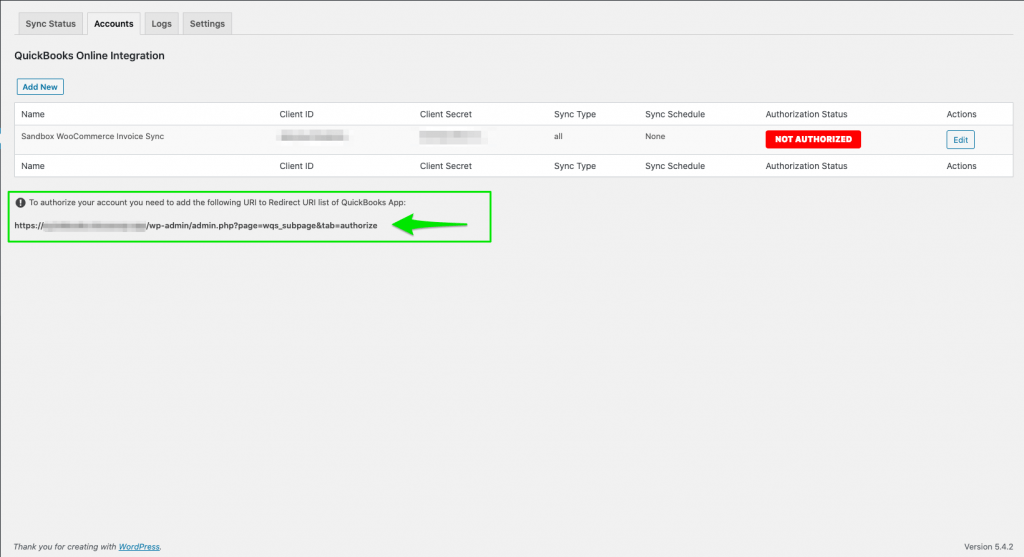
Step 6: Save APP then copy client ID and Secret and put both in plugin settings
Or if you are a visual person. A quick video to get the ID and Secret
Step 2: Setup Account and Connect
- Click the Accounts tab for WooCommerce QuickSync
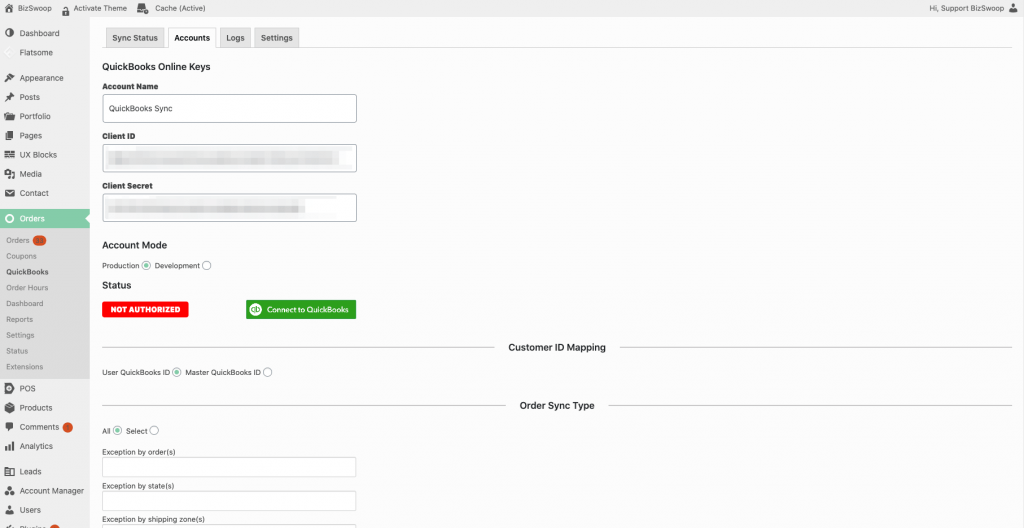
- Select Account Mode Production or Development
- Input a Account Name
- Enter in the Client ID and Client Secret from your QuickBooks account
- Click the Connect to QuickBooks button
- Once clicked a dialog window will appear requesting authorization to connect to your QuickBooks account
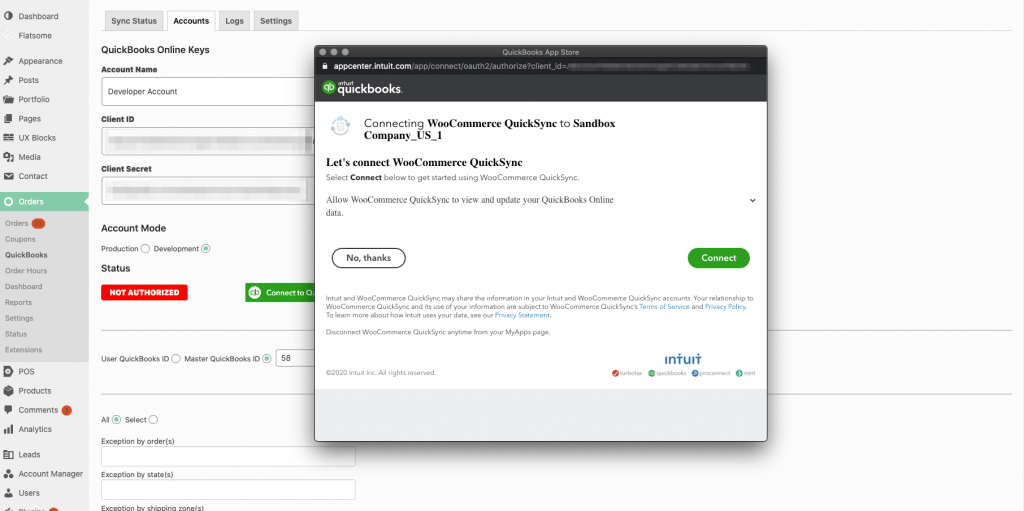
- Review to verify the account and approve terms. Click Connect
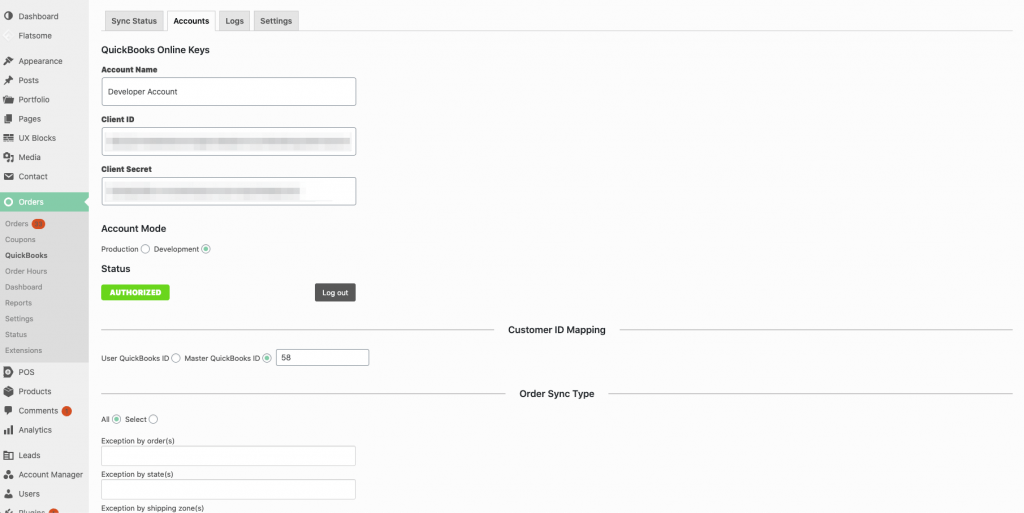
- After clicking Connect, the account will show Authorized for syncing to start.
- You are now all set to start syncing WooCommerce orders to your QuickBooks account!
Disconnect from QuickBooks
Disconnecting from QuickBooks account
Step 1: Log Out of Connected Account
- Click the Accounts tab for WooCommerce QuickSync
- Click Edit on the Account you would like to disconnect
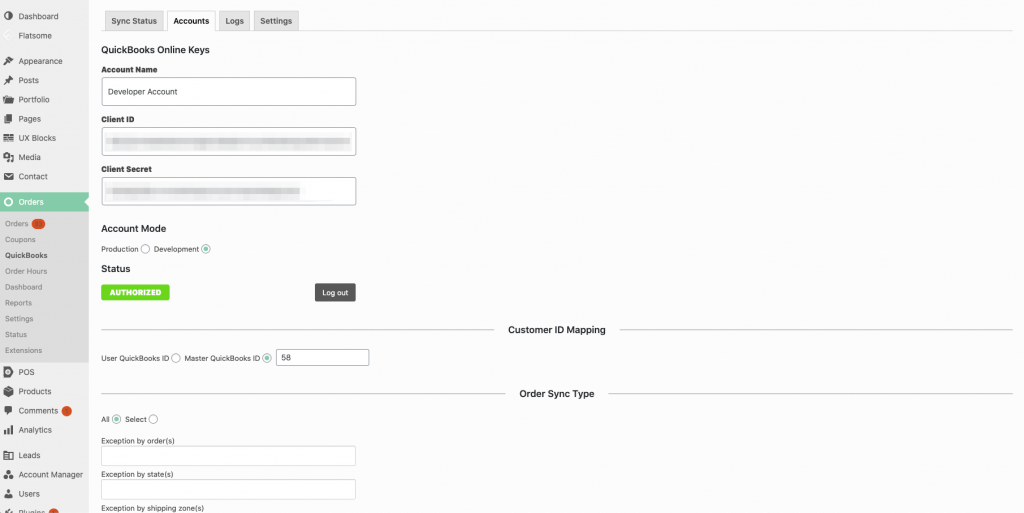
- Click Log Out, next to label Authorized
Verification: WooCommerce QuickSync is Disconnected
- After Log Out is clicked, the Accounts tab will load, showing a notification confirmation the Account has been disconnected
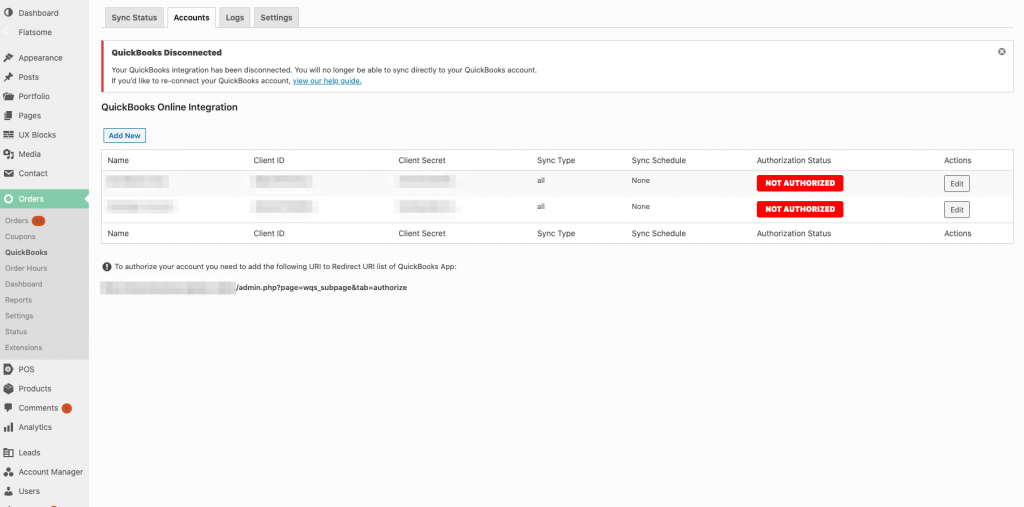
- The authorization status will now also show as Not Authorized for the account
*All product names, trademarks and registered trademarks are property of their respective owners.


