Documentation
Note: UI Images or Video of the Settings are subject to small discrepancies in style or layout from various new versions.
Step 1: Install and Activate Required Apps
For the Pickup Delivery Scheduler plugin to function, you need the Store Order Hours Basics plugin application. Good news, the plugin is free and included in your order.
Download. Upload. Install and Activate the plugin. The Store Order Hours plugin provides the master Store schedule for your website. Use the plugin to manage the schedule for opening and closing the store. Don’t worry, we provide a setting in the Pickup Delivery Scheduler plugin to allow pickup and delivery to be scheduled outside store closed hours.
Version < 3.0
Included in the order is a download link for the app. Download. Upload. Install and Activate the plugin. Once the plugin is activated. The license is a passive license, activated and linked to the purchase URL
Version > 3.0+
License is an API based license, linked to the purchase URL. After purchasing, you will receive an API key. Under the Order Type tab, enter the activation email and API key to activate the plugin to enable functionality on checkout.
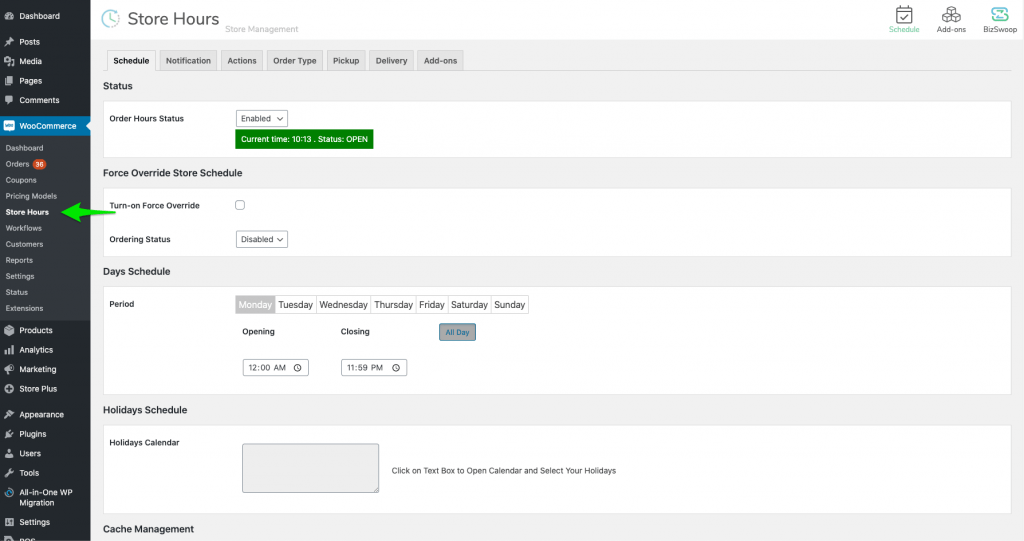
Now let’s get started. After Store Order Hours is activated. Under the WooCommerce menu, you have the option Store Hours. Click Store Hours to access all settings.
All the settings for Pickup and Delivery functionality are on the Order Type, Pickup and Delivery tabs. Update the settings for your business requirements.
Step 2: Setup Basic Settings
The plugin requires the time and date format from the General Settings be setup properly. We’d recommend using the following time and date settings, this will make sure the time and date are properly calculated by the scheduling logic to display the time and dates on checkout.
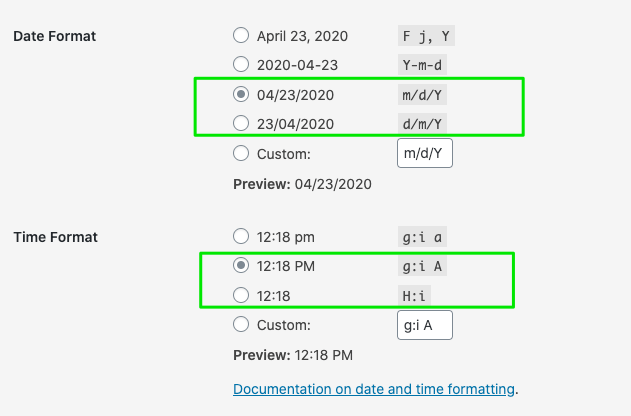
Date Format: m/d/Y or d/m/Y
Time Format: g:i A or H:i
Setting up Shipping Zones and Methods
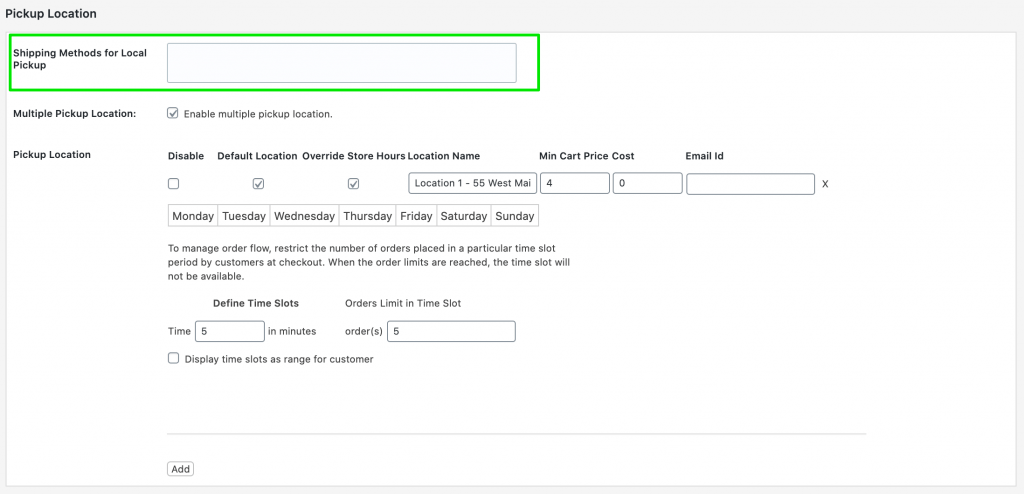
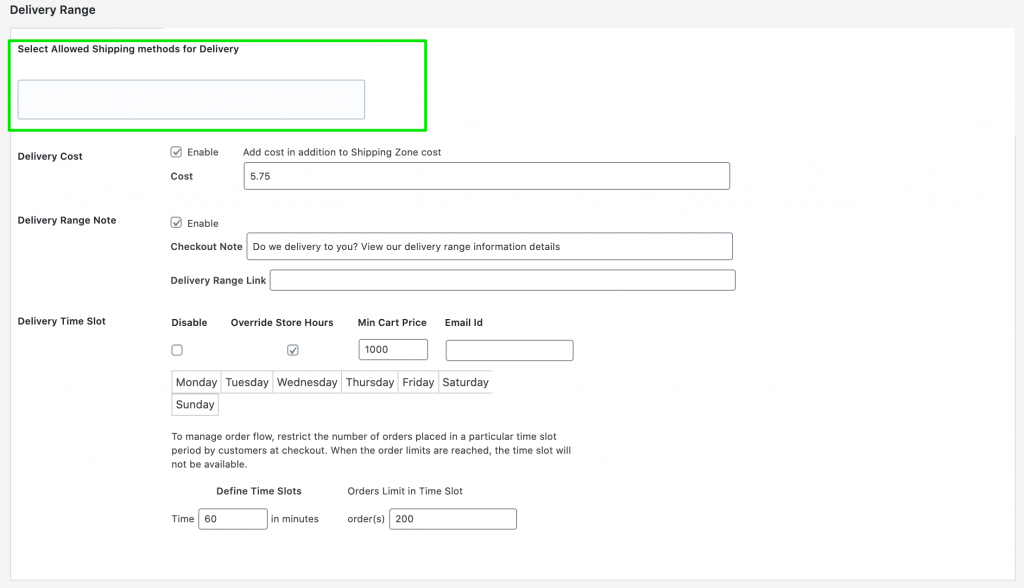
To start, Shipping Methods need to be mapped to the Order Type of Pickup and Ship, highlighted in the red box. Mapping Shipping Methods will enable the options to display at checkout for customers to select based upon Shipping Zone matched
As part of the setup process, you need to create Shipping Zones and Shipping Methods in WooCommerce. The plugin uses these Shipping Methods to map the functionality at checkout for the order type.
Let us guide you on getting that setup.
The important thing to remember with WooCommerce, it uses Best Match Shipping Zones when calculating the correct Shipping Zone. As a result, once a zip code is matched, all Shipping Methods within this zone are available to the customer to select.
As a result, we setup this Shipping Method configuration within the plugin for Take-Out Delivery as a two step setup process.
Step: 1
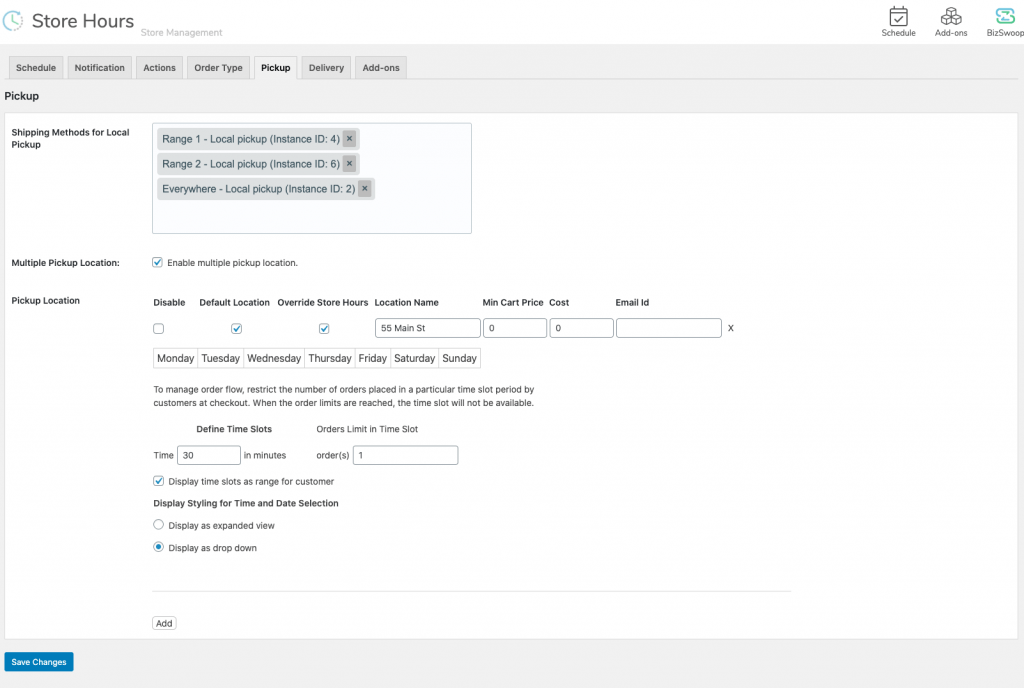
For every shipping zone you setup, setup multiple shipping methods that can apply to each type. Meaning. Let’s say in Zone 1 with a zip code 94123. If within this zone, you want to allow Pickup and Delivery for when the zip code is a match to this zone. Add both Shipping methods: Local Pickup and Flat Rate Shipping Delivery.
Here is a quick sample video of how we’ve setup a zone with has a Pickup option, Delivery option and a Ship option for a specific set of zip codes.
Now, you can move to
Step: 2
Map each shipping method to a specific Order Type. For this example, we will map the Shipping Method “Pickup & Take-Out” to the Pickup option. And we map the Shipping Method “Delivery by car” to the Delivery option. The other two options for Gift Certificate, we don’t map to a specific order type. Shipping Methods not mapped to an Order type of Pickup or Delivery will be available for the Ship type. If you have this enabled in the settings.
Here is a quick sample video of how we’ve mapped the Shipping Zone to both Order Types:
Quick note. You might notice under the Pickup Order type, we also had the Shipping method mapped “Pickup Restaurant”, this is a shipping method applied to Everywhere. This will allow any zip code inputed by the customer to allow a Pickup option in checkout.
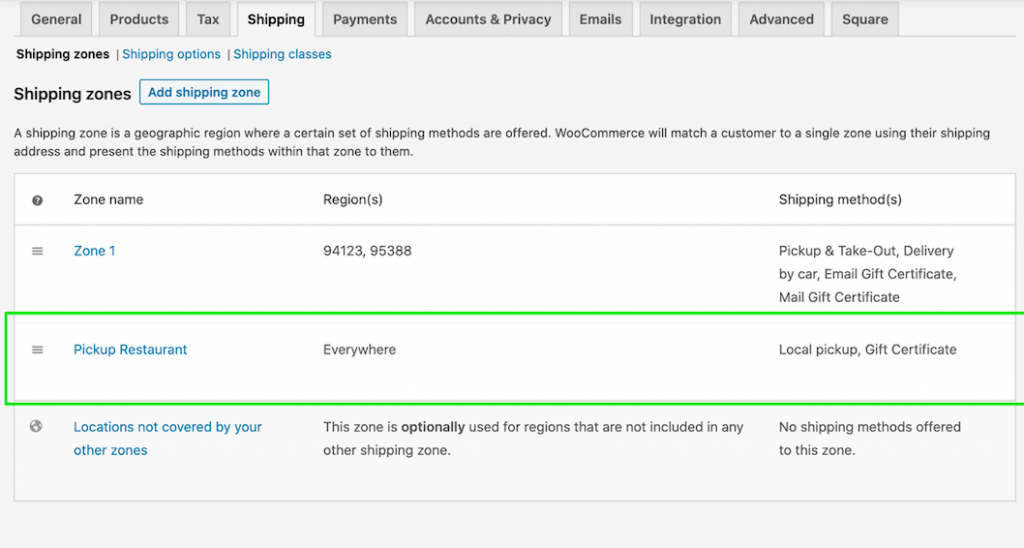
After these two steps. Now the checkout functionality will work as you expect. I will place in the zip code 94123 which is set in Zone 1. The WooCommerce Best Match Shipping zone is found. Both Pickup and Delivery are now showing as options to select.
As shown in this quick video:
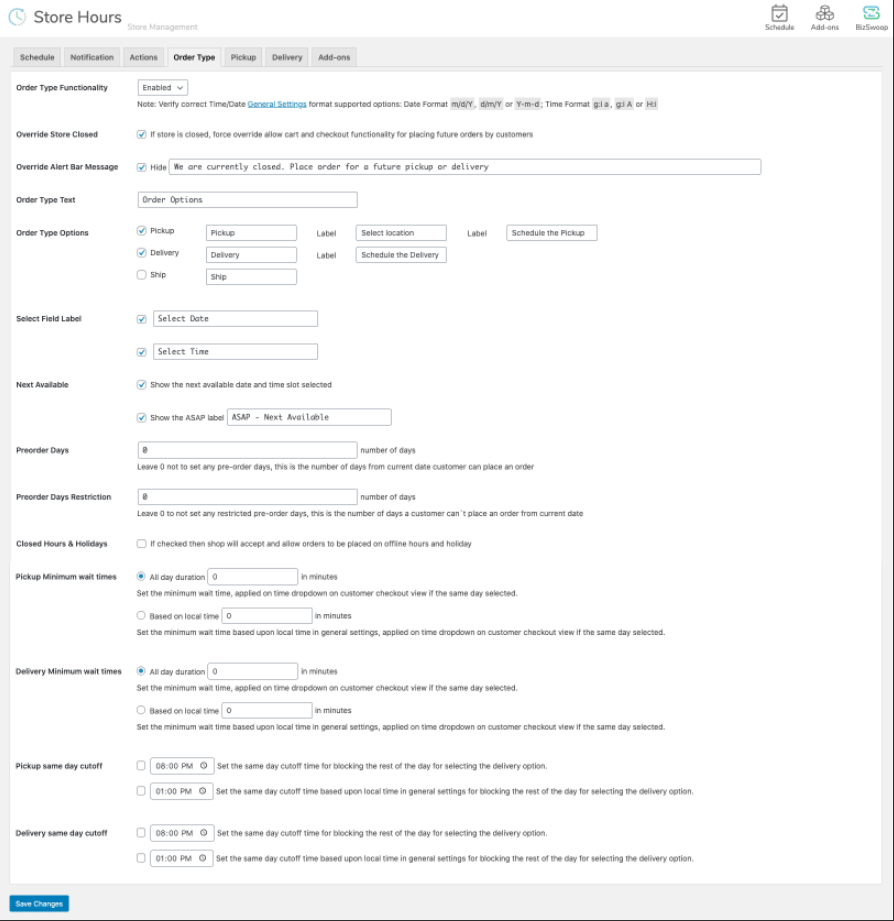
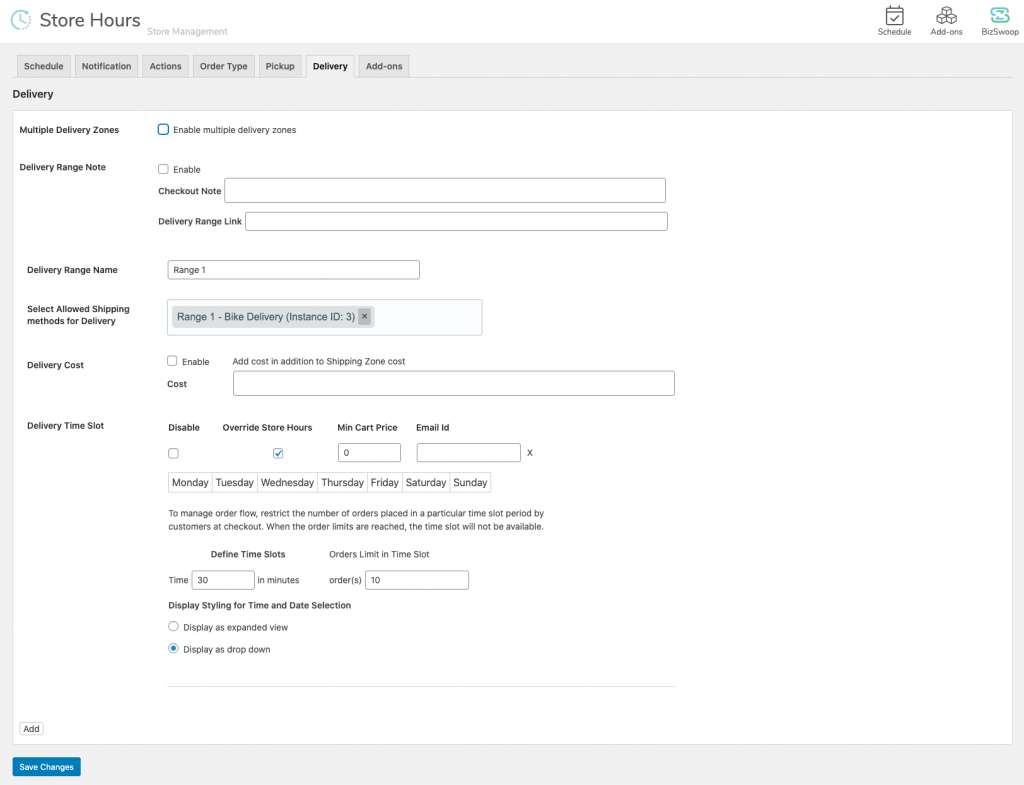
Often you need to have the order types of Pickup or Delivery have unique schedules compared to the master Store Hours Scheduler. To allow Pickup or Delivery schedules outside the master store hours, enable the Override Store Hours functionality.
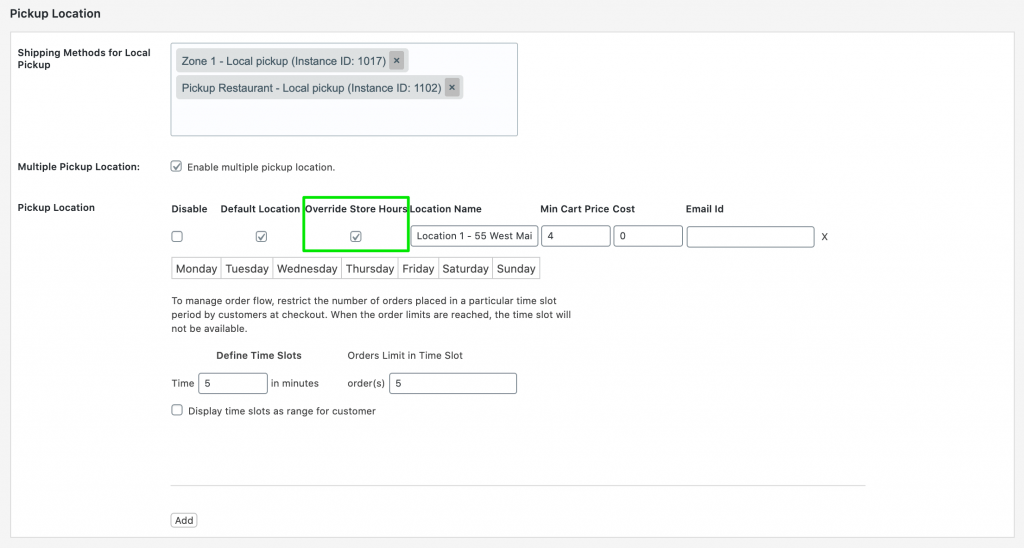
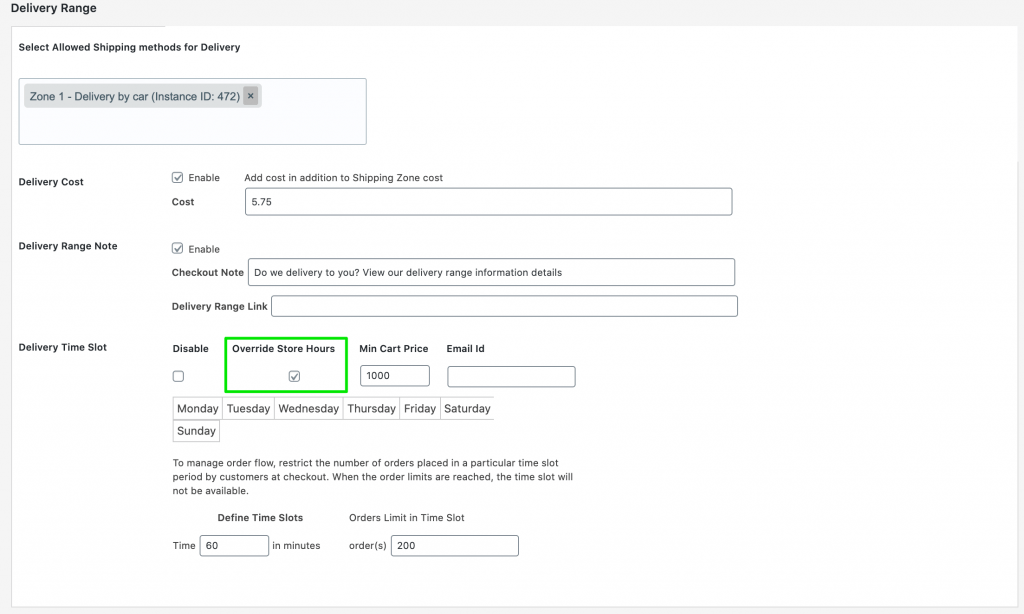
Once the Override Store Hours is enabled, the Pickup and Delivery schedules can display hours ourside the Store Hours Scheduler.
Setting the schedule is an important step for the Pickup and Delivery configuration, but don’t forget to enable the Day Schedule. By default, the setting is disabled. Even if you add times in the calendar, the day schedule is not enabled. The same setting is available on the Delivery schedule as well.
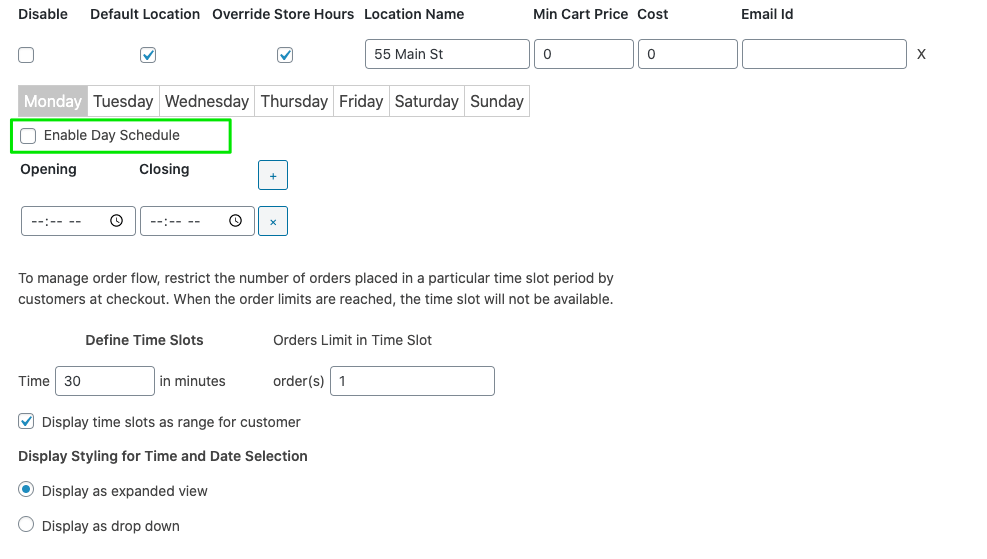
Click the checkbox and scroll down, click Save Changes.
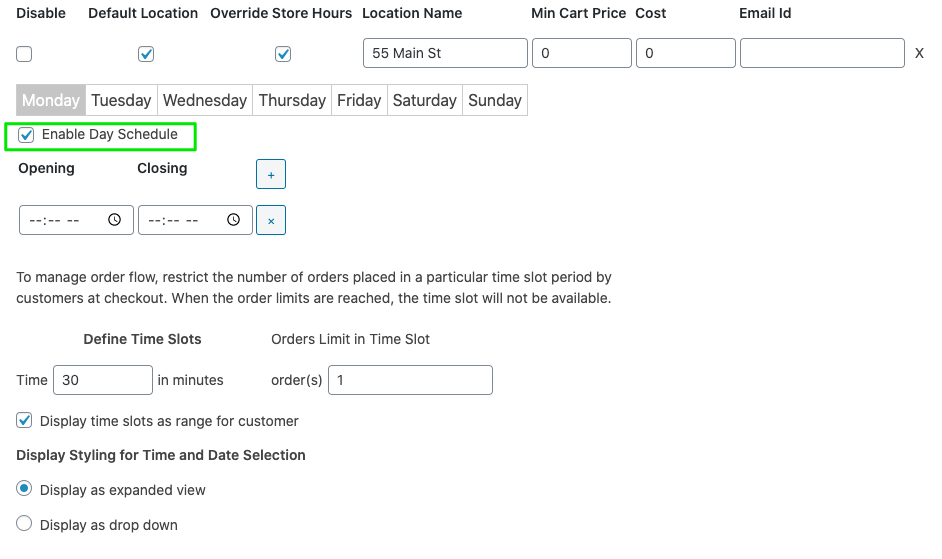
Now the day schedule is active for customers to select at checkout.
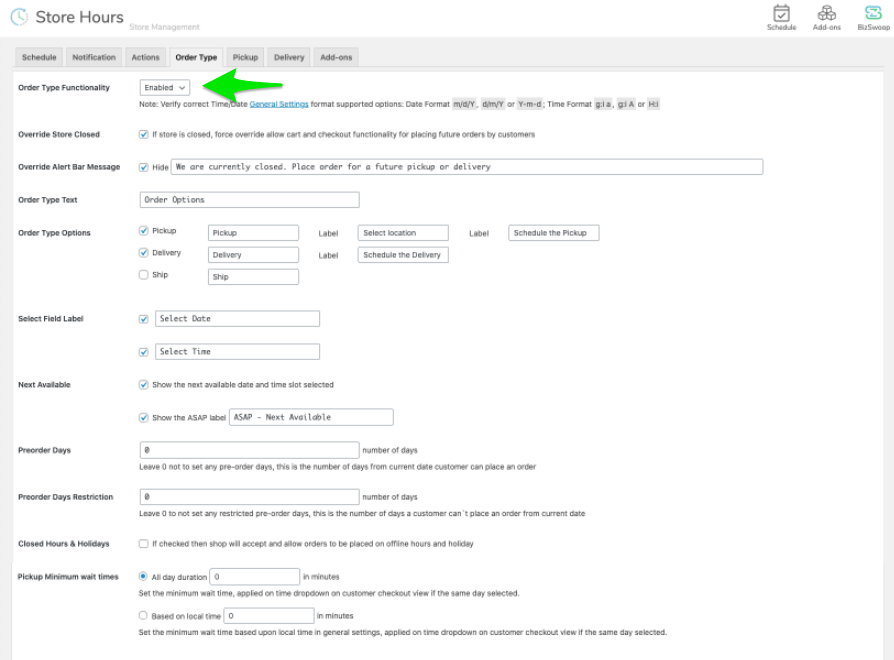
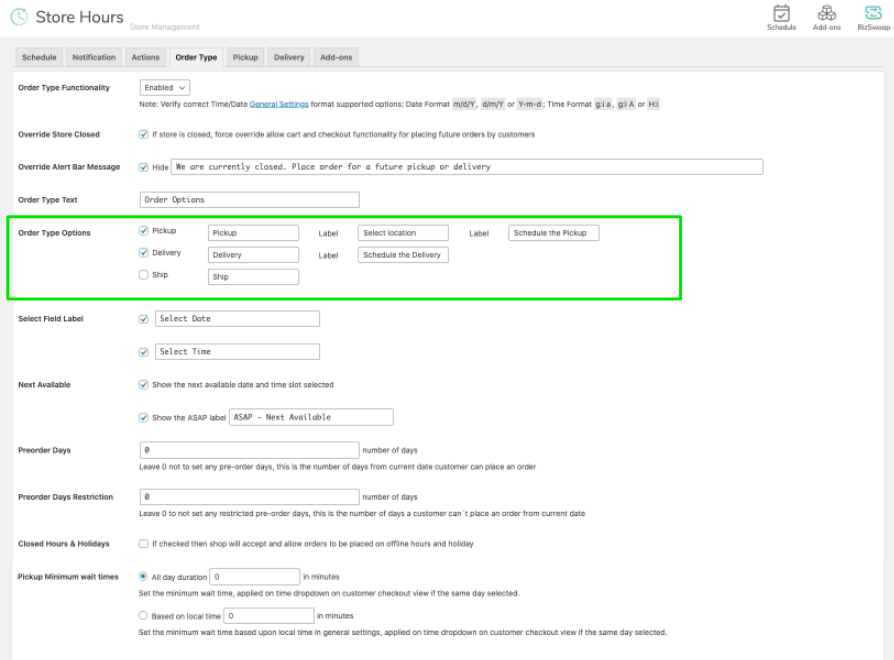
Step 3: Enable Pickup & Delivery on Checkout Page
You can select 3 different Order Type options: Pickup, Delivery or Ship. Click the checkbox to enable the Order Type. Once enabled, you can customize the name.
After reviewing the settings configured, you are now ready to enable the functionality on checkout