

Product Customization
Adding a Custom Price Field to WooCommerce Products
Oct
Custom pricing serves as a potent tool in achieving eCommerce agility, enabling WooCommerce store operators to tailor product prices according to specific variables. This flexibility benefits not just the store owners but also enhances the shopping experience for customers.
The advantages are numerous, ranging from heightened customer satisfaction and increased average order value to securing a competitive edge in the marketplace.
WooCommerce supports a variety of custom pricing strategies, each with its unique set of benefits and considerations. To fully capitalize on these pricing models, you’ll need the proper tools and insights.
In this in-depth guide, we navigate the complexities of custom pricing within the WooCommerce ecosystem. You’ll discover key strategies to employ, top tools to utilize, and best practices to ensure you maximize the gains from your custom pricing initiatives.
Whether you’re a WooCommerce store owner, an eCommerce professional, a web developer, or a digital marketer, this guide aims to equip you with the knowledge to exploit the full potential of custom pricing. Let’s get started!
Demystifying custom pricing in WooCommerce
Custom pricing in WooCommerce refers to product pricing that isn’t fixed, but rather fluctuates based on specific variables. It’s an advanced pricing strategy that allows WordPress store owners to set different prices for their products based on certain conditions.
This kind of pricing strategy can be incredibly useful for a variety of eCommerce businesses, from small boutiques to large online stores.
With custom pricing, you can:
- Offer different prices to different customer segments.
- Let customers name their own price for a product.
For instance, you may want to offer lower prices to wholesale buyers or loyal customers, or you may want to enable customers to choose their own price for certain products.
Both these strategies can lead to increased sales and customer satisfaction.
Custom pricing is not just about flexibility in pricing, it’s also about offering purchase options that suit a wider range of customers. It’s about understanding your customers’ needs and preferences and offering them prices that they find fair and attractive. This makes custom pricing a flexible strategy that benefits both store owners and customers.
The advantages of custom pricing
The benefits of using custom pricing in WooCommerce are manifold. Here are some of the most notable ones:
- Increased sales and average order value: By offering different prices to different customer segments, you can attract more customers and increase your sales. Moreover, by offering quantity discounts, you can encourage customers to buy more products, thereby increasing your average order value.
- Enhanced customer satisfaction: Custom pricing allows you to offer prices that are tailored to your customers’ needs and preferences. This can lead to higher customer satisfaction and loyalty.
- Competitive advantage: By offering unique pricing options, you can differentiate your store from your competitors and gain a competitive advantage.
Exploring different price types and configurations
Let’s delve a bit deeper into some of the main types of custom pricing:
- Role-based pricing: This type of pricing allows you to set different prices for different user roles. For example, you can offer lower prices to wholesale buyers or members.
- Bulk/quantity pricing: With this type of pricing, you can offer discounts on larger quantities. This can encourage customers to buy more products.
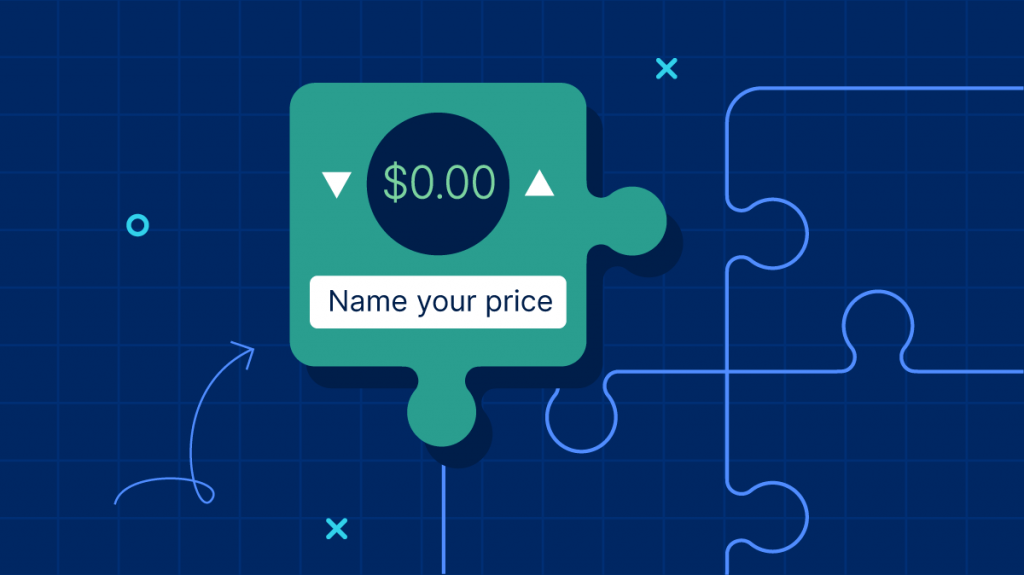
- “Name your price” pricing: A unique pricing strategy that allows customers to pay what they want for your products. It can be a great way to attract more customers and increase sales.
- Configurable product pricing: This type of pricing allows you to set different prices for different product configurations. For example, a T-shirt with a custom design may be priced higher than a plain T-shirt.
Each of these custom pricing strategies has its own advantages and can be used in different situations. The key is to understand your customers and choose the pricing strategies that best meet their needs.
How to use plugins for custom pricing
While WooCommerce is a powerful eCommerce platform, it doesn’t offer native support for custom pricing strategies. This means you’ll need to rely on supplementary plugins to add this functionality to your online store. The good news is that there’s a variety of plugins available that can help you implement different types of custom pricing strategies.
The type of plugin you choose will depend on your store’s unique requirements.
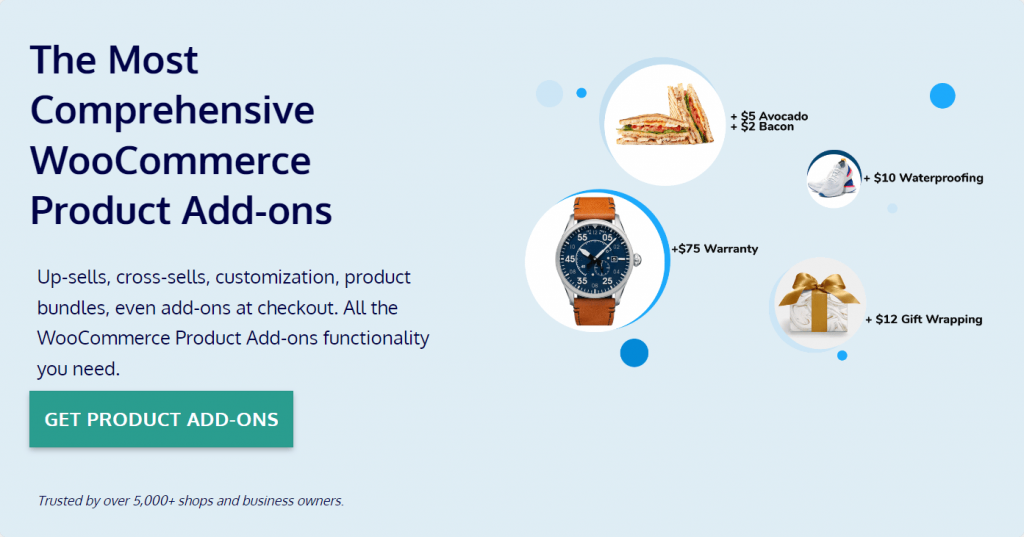
For instance, if you want to set up configurable products that have variable pricing depending on the user’s selections, you’ll need a product configurator plugin like Product Manager Add-ons, which allows you to add various types of product add-ons, configure price adjustments, and more.
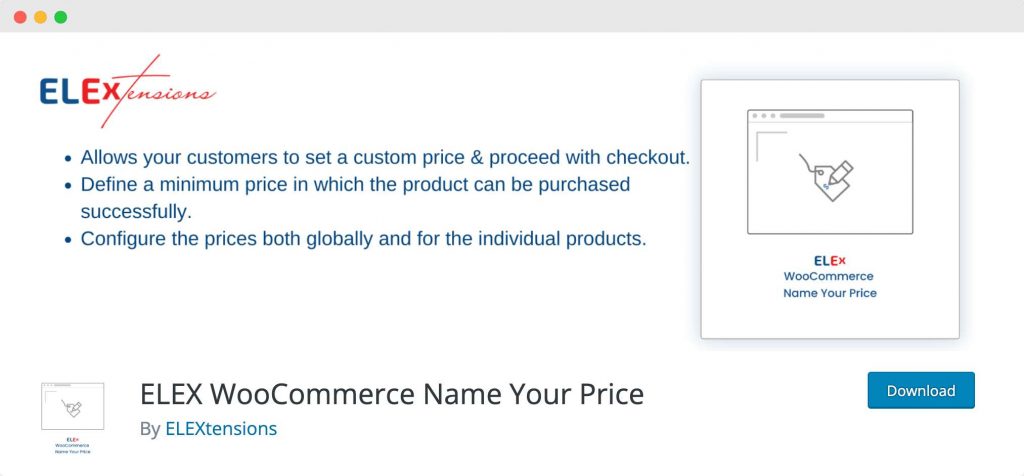
On the other hand, if you’re looking to set up a “name your price” pricing strategy, you’ll need a dedicated plugin like the ELEX WooCommerce Name Your Price plugin, which allows your customers to pay what they want for your products.
It’s important to note that while these plugins can greatly enhance your store’s functionality, they also require careful setup and management. Therefore, it’s essential to thoroughly understand how they work and how to configure them to best meet your store’s needs.

The #1 Add-Ons Plugin
for WooCommerce
Create custom products with checkboxes, color swatches, text, file upload & more - on the product page, in cart or at checkout!
Configuring custom products with Product Manager Add-ons
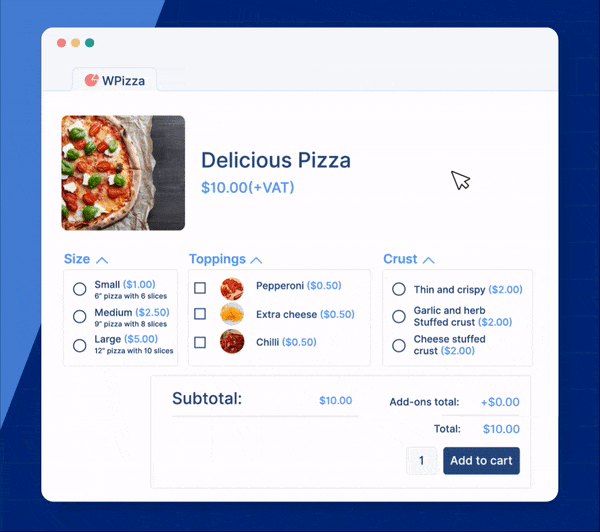
The Product Manager Add-ons plugin is a powerful tool that allows you to set up configurable products with custom pricing for different customization or add-on options. Here’s a step-by-step guide on how to set up a configurable product using this plugin:
Step 1: Download, install, and activate the plugin
- Download Product Manager Add-ons from the BizSwoop website.
- Navigate to your WordPress dashboard. Go to Plugins > Add New > Upload Plugin.
- Upload the .zip file you downloaded for the plugin.
- Install and activate the plugin.
Step 2: Create a new product
- Go to Products > Add New.
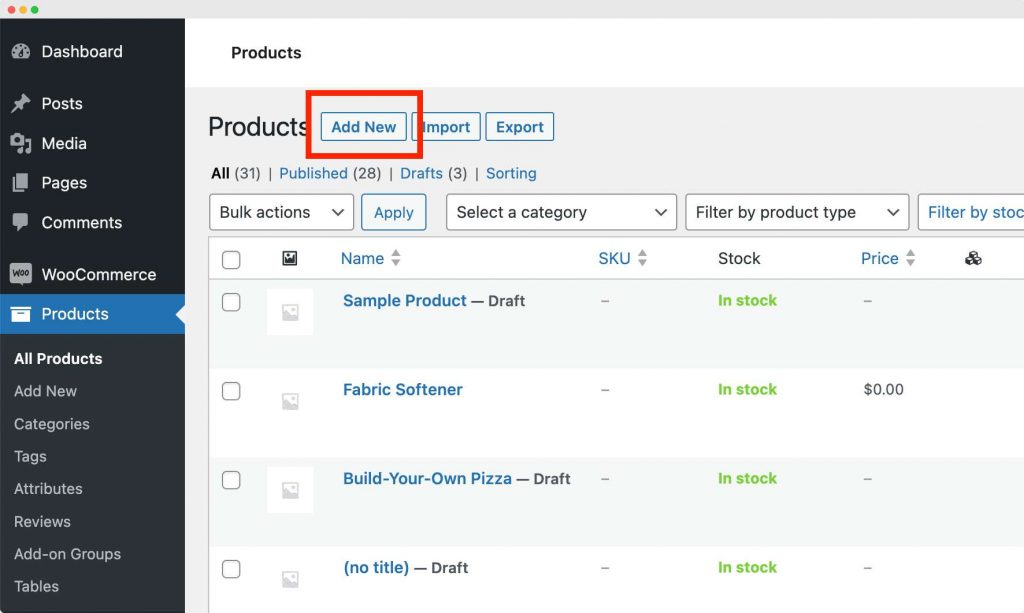
- Configure the product settings, including the name, price, a description, and an image.
- Preview the product and hit Publish to make the product available in your store.
Step 3: Add product customization options
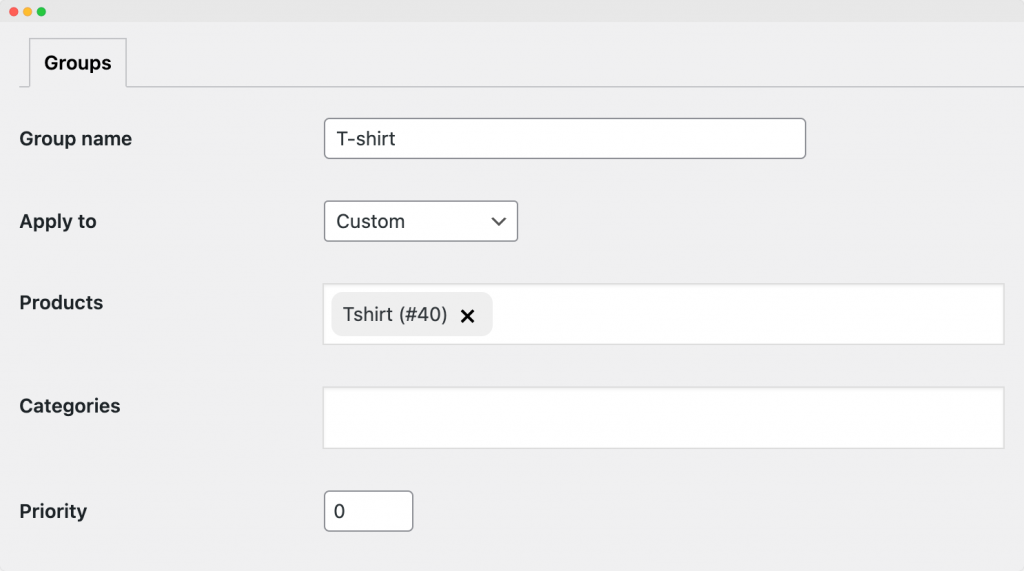
- Go to Products > Add-on Groups. Click Add New.
- Add a name for the add-on group and decide where you want to display the customization options.
- In this case, since we want customers to be able to modify the base T-shirt product, we will choose Custom and add the product details below.
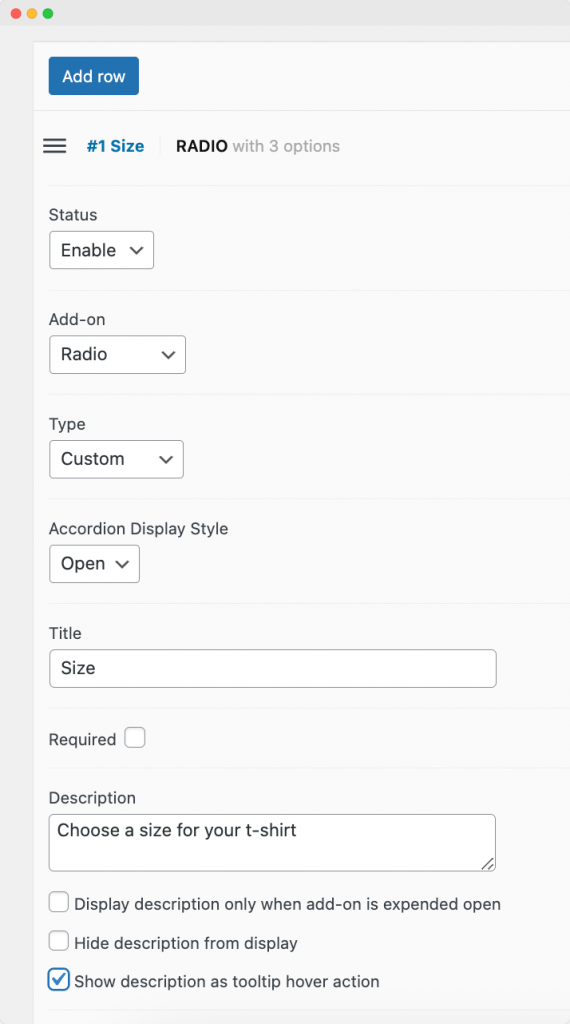
- Give the add-on a name. If you’re creating an option for T-shirt sizes, you might name it Size.
- Pick the type of input field for the add-on. When choosing sizes, for instance, it’s advisable to opt for a drop-down list or radio buttons since these restrict users to a single selection. In contrast, a checkbox would allow for multiple choices.
- Determine the pricing model, which could be a fixed price or a percentage amount of the product cost or the total bill.
- Include a description for the add-on if needed.
- Decide whether or not customers must select an option for this add-on.
Step 4: Set up custom pricing
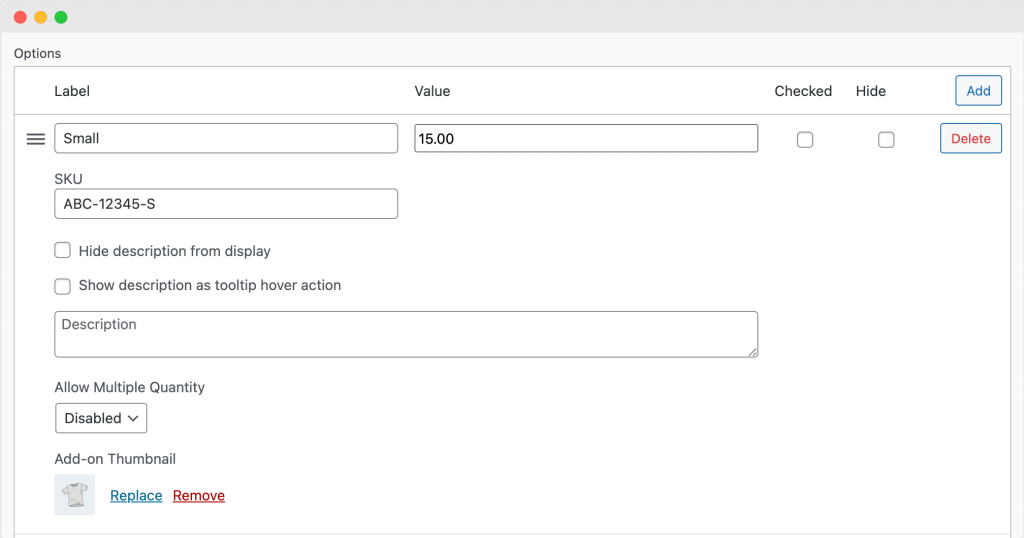
Once you’ve fine-tuned your add-on settings, hit the Add Option button to start crafting the specific choices your customers will have for personalizing their item. Think of these as the particulars, such as the T-shirt’s available sizes and colors, or the customization options for a logo.
Here’s how to set up each individual choice for your add-on:
- Assign a name to this specific add-on option. For instance, if you’re dealing with T-shirt sizes, your first option might be labeled ‘Small’.
- Specify the cost associated with this option. Keep in mind that if there’s no additional charge, you can input ‘0’.
- If applicable, input an SKU code to assist with tracking inventory.
- Determine whether customers can select multiple units of the same add-on. Consider a case where the customer is customizing the toppings they want on a pizza. When this feature is activated, the customer can request multiple servings of a particular topping, like mushrooms, or olives, etc.
- If it makes sense for your product, upload an image to visually enrich the available add-on choices.
5. Save and publish
Once you’re satisfied with your customization options and their pricing, click Save Changes. Your product is now live with custom pricing options!
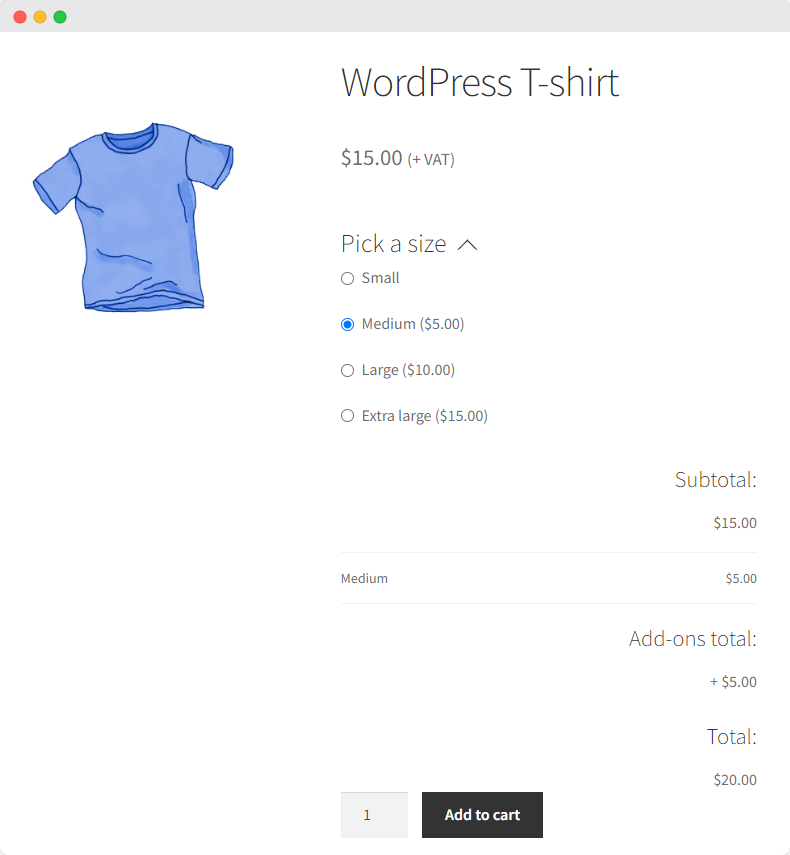
One of the great features of the Product Manager Add-ons plugin is its transparency about custom pricing. Each paid customization option is added as a line item in the product subtotal, so customers can see exactly what they’re paying for each option.
Configuring “Name Your Price” pricing with ELEX WooCommerce Name Your Price
The ELEX WooCommerce Name Your Price plugin is a fantastic tool for setting up a name-your-price field on your WooCommerce store. Here’s how you can set it up:
Step 1: Install and activate the plugin
- Go to Plugins > Add New.
- Search for ELEX WooCommerce Name Your Price plugin.
- Install and activate the plugin.
Step 2: Configure the plugin
- Navigate to WooCommerce > Settings > Name Your Price. Here, you can configure the settings for the name-your-price functionality.
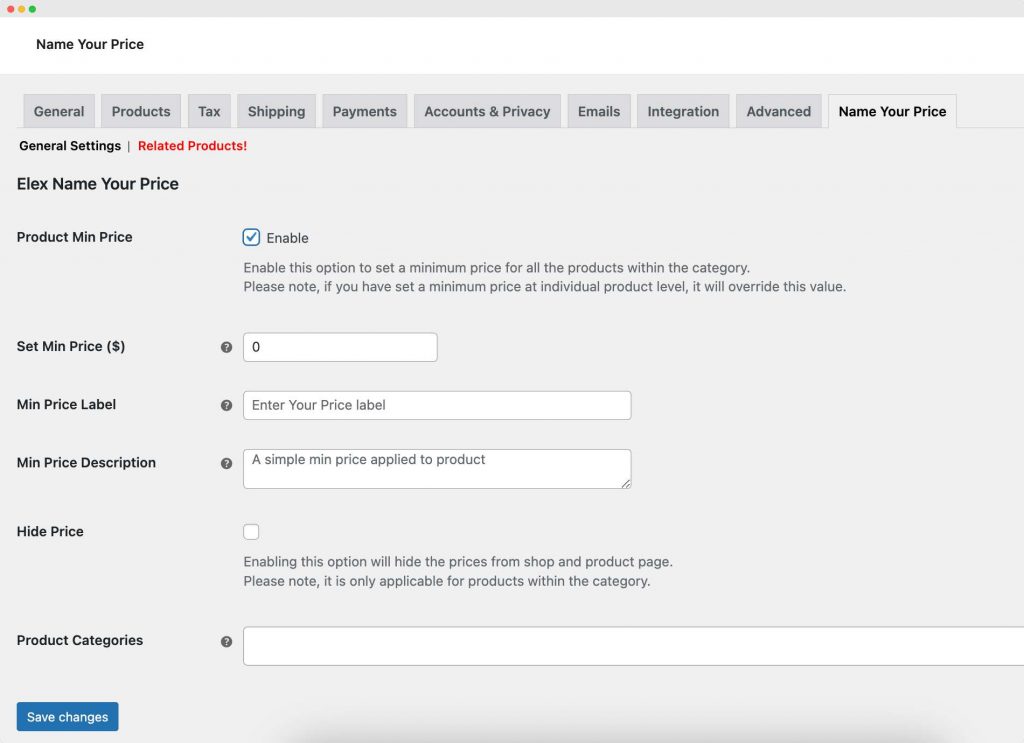
- Activate the Product Min Price feature to unveil a custom pricing option for customers on your store’s interface.
- Set a minimum price requirement in the Set Min Price field that customers must meet to complete their purchase.
- Input a personalized label that will appear next to the custom price field on each product page. The default text for this is Enter Your Price.
- Provide a description for the price, which will display following the custom price field on the product pages.
- If you prefer to keep the actual prices undisclosed, turn on the Hide Price feature to remove the price display from the product pages.
Note that these configurations will take effect across all products in your store. To customize these settings for individual products, navigate to the respective product’s dashboard and adjust the parameters as needed. You can also apply the ‘Name Your Price’ field to specific product categories by adding these in the Name Your Price settings panel.
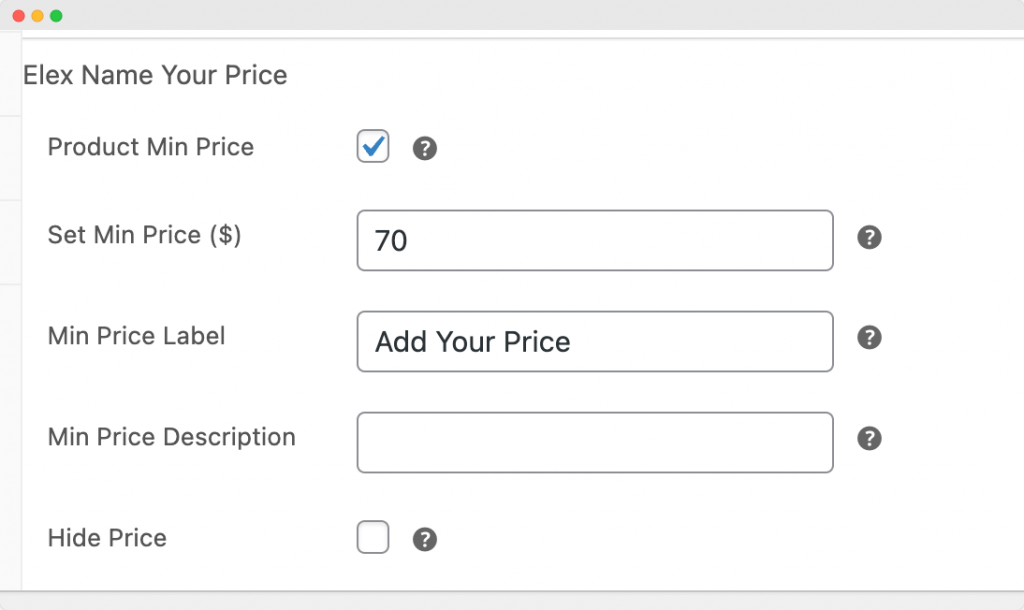
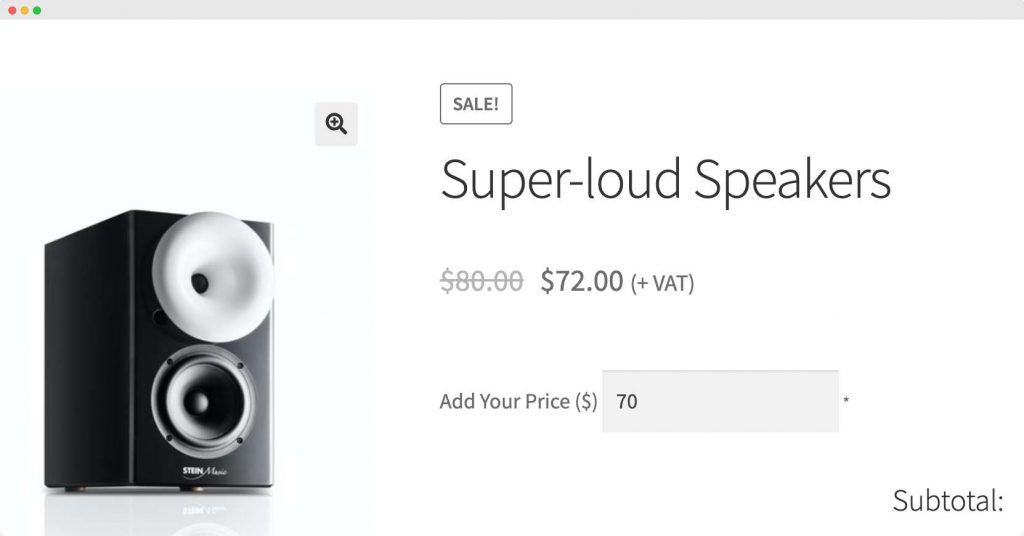
Step 3: Add the name-your-price feature to individual products
- Go to Products. Select the existing product you want to configure or add a new one.
- Scroll down to the Product Data section > ELEX Name Your Price
- Set a minimum and maximum price for your name-your-price product. This gives you control over how much customers can pay for the product while still giving them the freedom to choose their price.
Step 4: Save and publish
- Once you’re done setting up the product, click Publish. Your product is now live with a name-your-price field!
Remember, the key to successful custom pricing is understanding your customers and their willingness to pay. With these plugins, you can offer flexible pricing options that cater to a wide range of customers, potentially boosting your sales and customer satisfaction.
Exploring other plugins for custom pricing
While the Product Manager Add-ons and ELEX WooCommerce Name Your Price plugins are powerful tools for implementing custom pricing strategies, they only scratch the surface of what’s possible. There are many other plugins available that can help you implement a wide range of custom pricing strategies on your WooCommerce store.
Some of the most popular types of custom pricing are conditional discounts like bulk pricing, quantity-based pricing, and user-role-based pricing. These pricing strategies can be incredibly effective for boosting sales and customer satisfaction.
If you’re looking to set up conditional pricing based on these kinds of variables, you might want to invest in a conditional discounts plugin. These plugins allow you to set up complex pricing rules based on a variety of conditions, such as the quantity of products in the cart, the user’s role, the current date and time, and more.
There are several popular conditional discounts plugins available for WooCommerce. Here are a couple of options to consider:
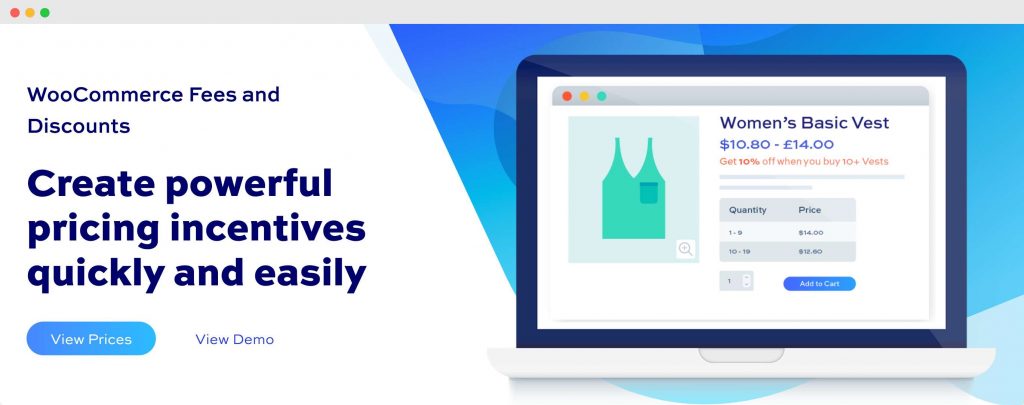
WooCommerce Fees and Discounts
WooCommerce Fees and Discounts allows you to set up a variety of discounts and fees based on conditions like cart totals, user roles, and more. It also supports bulk pricing, quantity-based pricing, and other types of custom pricing.
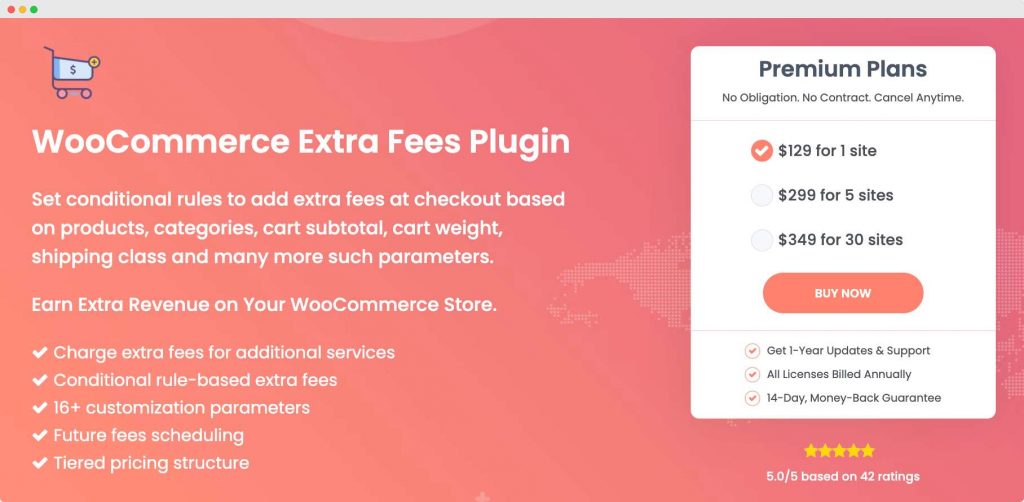
WooCommerce Extra Fees Plugin
The WooCommerce Extra Fees Plugin allows you to add extra fees or discounts to the cart based on a variety of conditions. It supports conditions like product quantity, user role, cart total, and more.
Remember, the key to effective custom pricing is understanding your customers and their needs. By using the right plugins and setting up the right pricing strategies, you can offer prices that appeal to a wide range of customers, ultimately boosting your sales and customer satisfaction.
Best practices and tips for successful custom pricing
Implementing custom pricing in WooCommerce can be a game-changer for your online store. However, to ensure its success, there are a few best practices and tips you should keep in mind:
- Clearly display pricing rules: Make sure your custom pricing rules are clearly displayed to your customers. This transparency not only fosters trust but also enhances the customer experience, which can help boost your average order value (AOV).
- Test thoroughly: Before your custom pricing setup goes live, test it thoroughly to ensure everything works correctly. This includes checking that all prices update correctly based on your rules and that the checkout process is smooth and error-free.
- Conduct market research: It’s always a good idea to keep an eye on your competitors. Conduct market research to discover the kinds of custom pricing strategies that are seeing success in your industry. This can provide valuable insights that can inform your own pricing strategy.
- Experiment and adjust: Don’t be afraid to experiment with different custom pricing strategies to see what your target audience responds best to. Monitor your sales and customer feedback closely, then make adjustments accordingly. Remember, the goal is to find a balance that maximizes both customer satisfaction and profitability.
Implementing custom pricing in WooCommerce requires careful planning and execution, but the potential benefits make it well worth the effort. By following these best practices and tips, you can set your store up for success.
Boost your sales today with custom pricing
Custom pricing strategies can revolutionize your WooCommerce store, offering an array of benefits from increased customer engagement to enhanced sales. By providing flexibility in pricing, you cater to a wider audience, fostering a sense of exclusivity and customer participation.
Whether it’s conditional discounts like bulk pricing, quantity-based pricing, user-role-based pricing, or the innovative ‘name your price’ strategy, the choice of strategy and plugins will depend on your store’s unique requirements.
For those looking to implement configurable products on their WooCommerce stores, the Product Manager Add-ons plugin is an excellent choice. It offers a broad range of customization options, allowing you to set up custom pricing for different add-ons and providing transparency in pricing to your customers.
Don’t wait to harness the power of custom pricing. Start exploring the possibilities with Product Manager Add-ons today, and watch as your sales and customer satisfaction soar to new heights!
The #1 Add-Ons Plugin
for WooCommerce
Create custom products with checkboxes, color swatches, text, file upload & more - on the product page, in cart or at checkout!