WooCommerce is a fantastic platform for selling products and services from your WordPress website. The core feature set includes a wide array of options for creating and selling products, and you can extend this functionality even further with thousands of supported integrations and plugins.
One such example is the ability to add checkboxes to your WooCommerce products. This is a great way to offer product personalization or add-ons, or to upsell related products that your customers might like.
The option to add checkbox fields to your WooCommerce product pages isn’t supported by core WooCommerce, but it can be easily added with the use of a supplementary plugin. In this post, we’ll cover how you can easily add checkboxes to your WooCommerce products, the benefits of doing so, and the best plugin for the job.
Why add checkboxes to product pages in WooCommerce?
Adding checkboxes to your WooCommerce products can provide various opportunities to both improve the customer experience and increase your average order value. Adding checkbox fields enables you to offer supplementary products, personalization options, or add-ons to your customers. For example, you could offer them the option to gift wrap a product or add a personalized engraving.
If you run an eCommerce store, there are various reasons why you might want to add checkboxes to your WooCommerce product pages:
Enable product personalization
Offering product personalization options on your WooCommerce store can increase the value of any product, while also helping your customers to find exactly what they want. The default options listed in your online store may not precisely meet their needs, and this personalization can help them find the perfect product.
Adding checkbox fields to your product pages provides a quick and easy way for customers to choose their preferred personalization options.
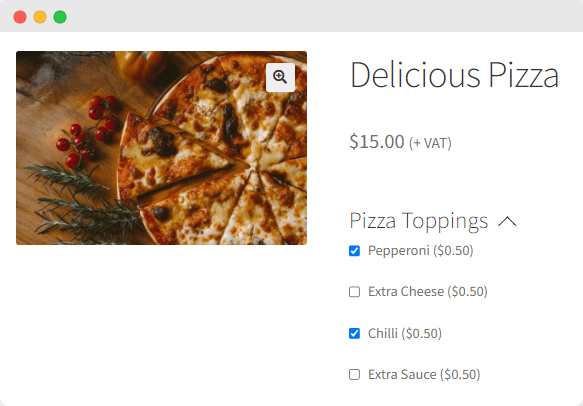
One example of this would be a pizza restaurant that offers a ‘create-your-own’ option, which uses checkboxes to enable customers to choose which toppings they want to add. They can choose a default pizza variety if they like, but why compromise on satisfaction when they can use the checkboxes to order exactly what they want?
Offer product add-ons
Offering product add-ons is a smart business strategy as it provides a way to increase the return from every sale. It’s a great method to add extra value to your customers while also increasing your bottom line. Using a checkbox field enables you to offer multiple add-on options directly from the product page, encouraging higher order values and providing your customers with a greater breadth of choices.
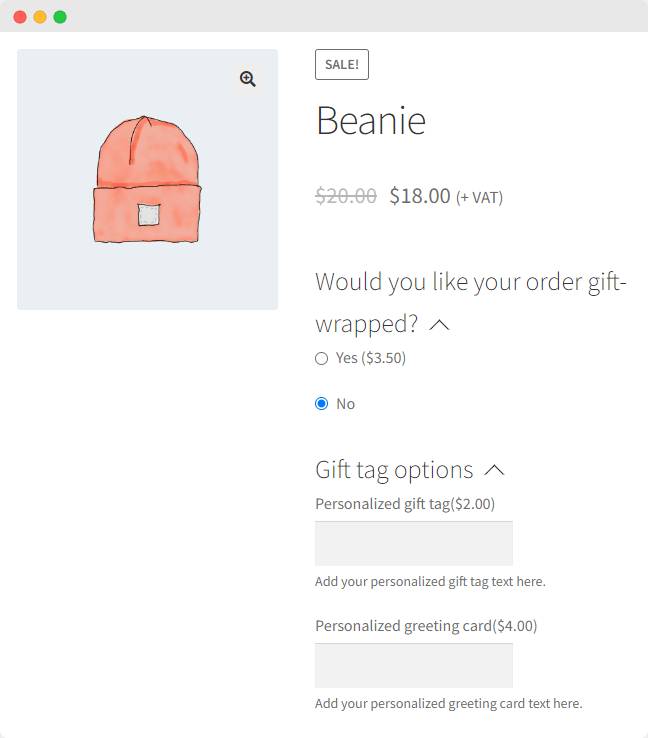
For example, an eCommerce store that offers a gift-wrapping service could use checkboxes to offer different gift options, such as greeting cards, gift receipts, wrapping, and other embellishments like ribbons and bows.
Upsell related products
When a customer puts an item in their shopping basket, this gives you an idea of the other products that may be relevant to them. It may just be that the customer is not aware of these items yet.
When your store sells a range of related products, you can use checkbox fields as a means to encourage customers to bundle products together. This not only increases the value of your orders but also saves customers time searching through your product catalog to find related products.
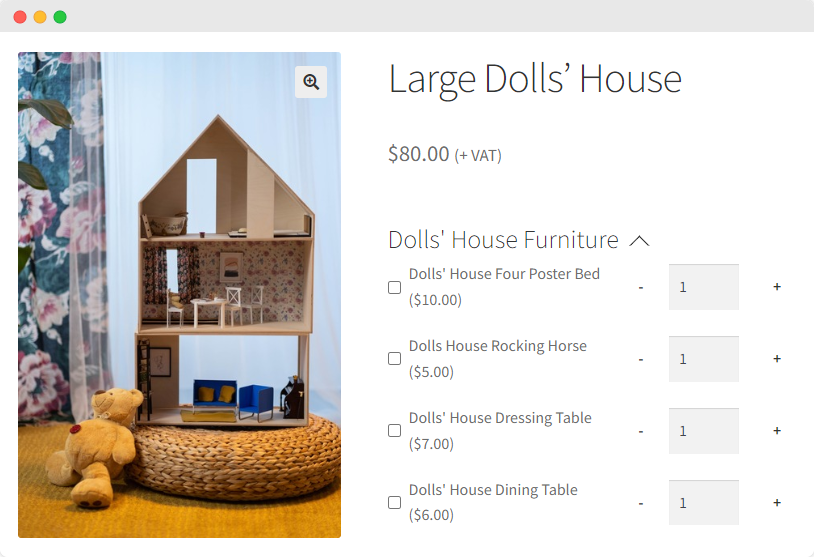
For instance, an online toy store that sells dolls’ houses could use checkboxes to offer related products like furniture, decoration, or other relevant accessories for the houses or dolls.
Why use checkboxes instead of other field types?
Using checkboxes enables you to list all of your product personalization options, add-ons, or related product upsells in one place, making it easier for customers to compare options and see what is available.
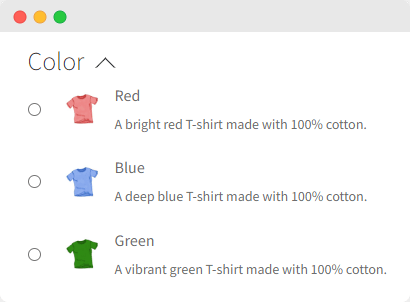
These checkbox fields have certain advantages over other field types, such as dropdown lists and radio buttons. Both of these field types only allow users to select a single option, while checkboxes enable customers to choose as many options as they like. This makes them the natural choice for add-ons or personalization options that are not mutually exclusive. However, they are less suitable for things like selecting product variations or attributes like colors, sizes, or patterns.
How do you add checkboxes to product pages in WooCommerce?
As we’ve mentioned, default WooCommerce does not support adding checkbox fields to your product pages. Therefore you will need a plugin to add this functionality.
There are several different plugins that can help you achieve this, but the best one for the job is Product Manager Add-ons, available from BizSwoop. This plugin allows online retail store owners to add a range of add-ons, up-sells, and customization options to their product pages.
Here are some of the main features of Product Manager Add-ons that make it the best choice for adding checkboxes to your WooCommerce products:
Create unlimited add-ons
Product Manager Add-ons has almost limitless scope for creating bespoke add-ons for your WooCommerce products. As well as checkboxes, the plugin offers multiple different field types, including dropdown menus, radio buttons, text fields, and file upload fields. These features enable you to create bespoke add-ons, upsells, and personalization options to meet the specific requirements of your store.

Intuitive add-on display
Aside from offering various custom field types, the plugin supports a range of display options to make your add-ons as user-friendly as possible. You can add thumbnail images or descriptions to show users what they will get from their add-on options, group different related add-ons together, or choose to only show certain add-on groups on specific product pages. Better still, Product Manager Add-ons is mobile-friendly, and is built to offer intuitive display options on any device.
Flexible add-on pricing
Product Manager Add-ons offers three different pricing structures for your add-ons, personalization options, and product upsells:
- Flat-rate, which includes any free add-ons you might offer
- Percentage, based on the individual product price
- Percentage, based on the cart subtotal
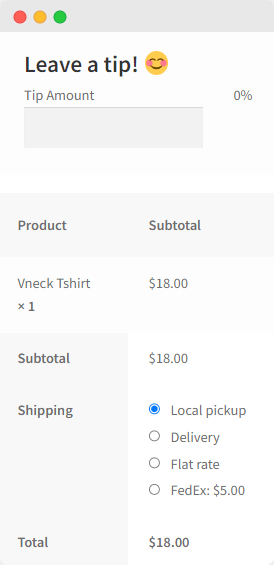
This enables you to set appropriate pricing for a range of different add-on types. For example, if you run an ice cream parlor, you might want to use flat-rate pricing when offering extra toppings on your ice cream sundaes, but percentage-based pricing when asking your customers to leave a tip.
Display checkboxes at the cart and checkout
Many online shoppers are likely to make numerous purchases across your site. Therefore some add-on options, such as tipping or custom delivery options, are not well suited to product pages. These are better placed on the cart or checkout pages. Product Manager Add-ons supports the addition of add-ons to both the cart and checkout pages as well as individual product pages or whole product categories.
Product Manager Add-ons is available from $49/year, with a 14-day money-back guarantee available, giving you a great opportunity to test the plugin out and see for yourself the benefits it could bring to your eCommerce store.

The #1 Add-Ons Plugin
for WooCommerce
Create custom products with checkboxes, color swatches, text, file upload & more - on the product page, in cart or at checkout!
Tutorial: How to add checkboxes to WooCommerce products using Product Manager Add-ons
It’s clear that using Product Manager Add-ons to add checkboxes to your product pages provides a range of benefits to you and your customers. But how do you add them? The plugin is incredibly user-friendly, and the process is much easier than you might think.
Using the dolls’ house example from earlier in the post, this tutorial will walk you through the steps involved in adding customized checkboxes to your product page.
Step 1: Download and install the plugin – as we mentioned, it’s available from BizSwoop for $49/year, with a 14-day money-back guarantee.
Step 2: From your WooCommerce dashboard, navigate to Products > Add-on Groups and click “Add New.”
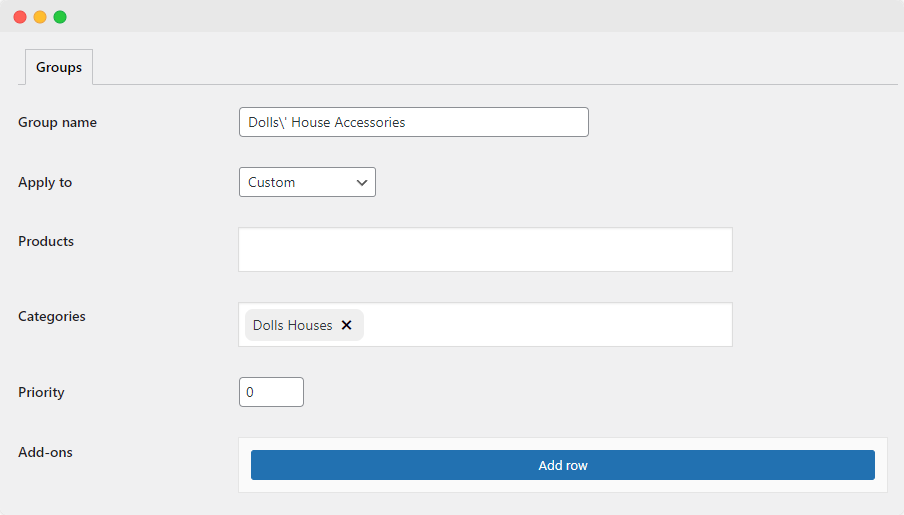
Step 3: Add a group name, for example, Dolls’ House Accessories, or Clothing for Dolls. Choose where the add-on group will be displayed. For example, do you want it displayed on all product pages, custom product pages, cart, or checkout?
In this instance, as we want to encourage customers to purchase add-on products like furniture or accessories when purchasing a dolls’ house from our online store, it makes sense to position this add-on group on all product pages within the ‘Dolls’ Houses’ category.
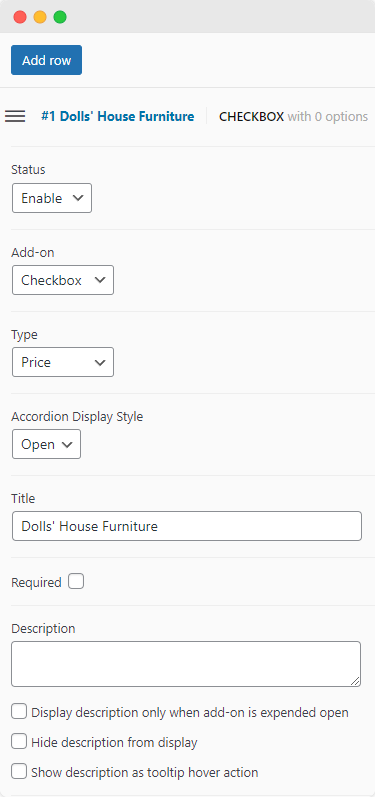
Step 4: Click “Add Row” to add an add-on to the group. Configure the add-on options, including:
- Add a name and description for the add-on. For example, your add-ons might be supplementary products that you want to upsell, so you could call the add-on Dolls’ House Furniture
- Choose the input field type – in this case, as we want to add a checkbox field, select “checkbox”.
- Choose how the add-on is priced as per the three pricing structure options: flat-rate, percentage, or subtotal percentage.
- Add a description (optional) to give your customers a clearer idea of what the add-ons you are offering are.
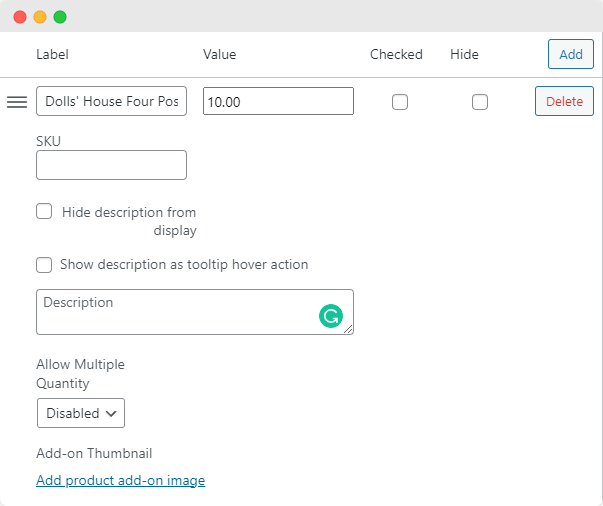
Step 5: Click ‘Add option’ to add an option for the add-on. Configure the option details, including:
- Add a name, SKU code, and description for the add-on. This is where you can add the details of the specific products you want to upsell. For instance, we could add options to add products like Dolls’ House Four-Poster Bed, Dolls’ House Rocking Horse, or Dolls’ House Dressing Table to the order.
- Set the price of your add-on option.
- Determine whether or not customers can buy multiple copies of this add-on option. This is useful in cases where it isn’t possible to add multiple copies of the same add-on to a particular product. For example, if you wanted to offer an add-on option to apply wallpaper to the different rooms of the dolls’ house, you would need to set ‘Allow Multiple Quantity’ to ‘Disabled’, as you wouldn’t want to give customers the option to apply multiple coats of wallpaper to the same room!
- If you would like, add a high-quality thumbnail image of the add-on option and a suitable description.
Step 6: Continue adding options or further add-ons until you have everything you need, then save your changes.
Step 7: Check the display of the add-on group on the store front-end. You can switch the order of add-ons or options within the group by going to Products > Add-on Groups, then clicking ‘Edit’ next to the group you want to adjust.
Offer add-on, personalization, and upsell options with WooCommerce checkbox fields
There are clear benefits of adding checkboxes to your WooCommerce product pages, both for your business and its customers. This checkbox functionality enables you to offer add-ons, product personalization, and upsells, which add value to products and improve the customer experience.
Checkboxes are best used in cases where you want to give customers the option to choose multiple add-ons at once, as opposed to dropdown menus or radio buttons, which only let customers select a single option.
When adding checkbox fields to your WooCommerce site, Product Manager Add-ons from BizSwoop is the best plugin option. It allows you to:
- Create unlimited bespoke add-ons
- Display your add-ons in an attractive, easy-to-use manner
- Offer different pricing structures for your add-ons
- Display add-ons on the cart and checkout pages
If you would like to reap the amazing business benefits of adding checkboxes to your WooCommerce product pages, why not give Product Manager Add-ons a try? You can purchase the plugin for just $49/year, with a 14-day money-back guarantee.
The #1 Add-Ons Plugin
for WooCommerce
Create custom products with checkboxes, color swatches, text, file upload & more - on the product page, in cart or at checkout!