
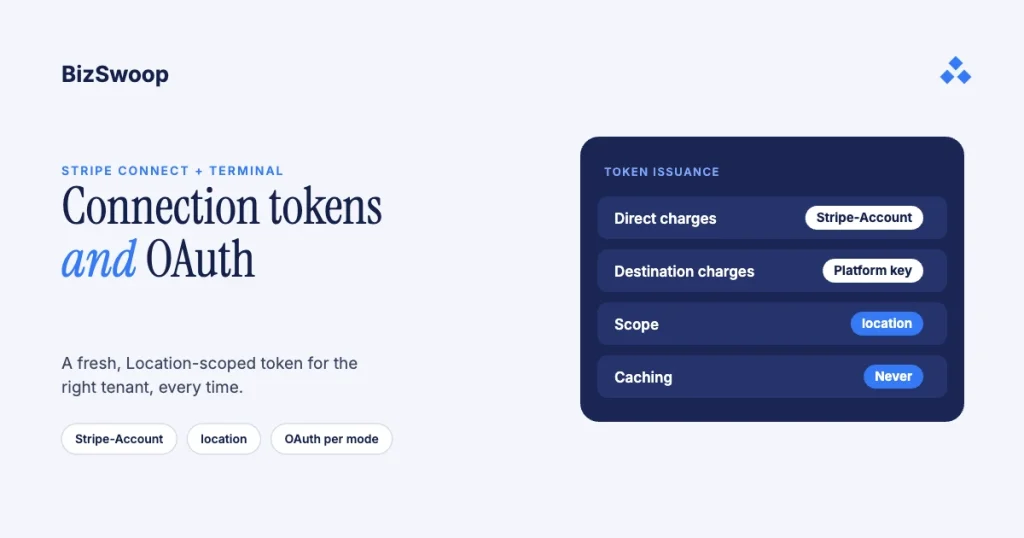
In a SaaS app, mint Stripe Terminal connection tokens server-side from an authenticated endpoint, return a fresh one every time the SDK asks, and scope each one to the tenant’s Location. On a Connect platform, which account you mint it on depends on your charge type: with direct charges you set the Stripe-Account header to the merchant’s connected account, because the readers live there; with destination charges you mint it on your platform account, where the readers live, and the Location scope is what keeps tenants apart. The connection-token question has no single answer in Stripe’s docs because it spans three pieces: the connection token API, Terminal with Connect, and the SDK’s token-provider callback. This guide puts them together into one multi-tenant pattern, including where OAuth still fits.
Jovvie, an official Stripe Partner, has built in-person Stripe Terminal payments for WooCommerce merchants since 2016. Every mechanic below was re-checked against Stripe’s documentation in November 2026. This guide sits under the Stripe Terminal SaaS embedding guide; for the surrounding isolation model, pair it with multi-tenant Stripe Terminal architecture.
Key Takeaways
- A connection token is short-lived and server-issued. Your backend creates it with your secret key and returns only its secret; Stripe says don’t cache or hardcode it.
- Return a fresh token on every request. The SDK calls your token provider whenever it needs to connect or re-authenticate; always fetch a new one.
- Charge type decides the account. Direct charges: create the token with the
Stripe-Accountheader. Destination charges: create it on the platform, without the header. - Scope every token to a Location. It then works only with readers assigned to that Location; scoping applies to internet-connected (smart) readers.
- OAuth is legacy for new platforms. Stripe recommends its hosted onboarding instead; if you do use OAuth, live and sandbox need separate authorizations with each mode’s Client ID.
- Secure the endpoint like a payment surface. Authenticate the caller, protect against CSRF, and derive the tenant from the session, never from the request body.
What is a Stripe Terminal connection token?
It’s a short-lived credential your backend creates and hands to the Terminal SDK so the SDK can connect to readers and take in-person payments, without your secret API key ever reaching the client.
The SDK runs on a browser, phone or countertop device, and clients can’t be trusted with your secret key. So your server uses the key to create a connection token and passes the client only its secret. Stripe is explicit that the SDK manages the token’s lifecycle and that you shouldn’t cache or hardcode it (Set up your integration). It’s also powerful: Stripe notes that the secret lets you connect to any Terminal reader and take payments with your account, which is why the endpoint has to be authenticated.
For a SaaS product, that’s what makes embedding Terminal tractable. Stand up one authenticated endpoint that returns a connection token, and the rest (connecting a reader, creating PaymentIntents, collecting payments) is standard SDK work. Server-driven integrations skip connection tokens entirely, because your backend drives the reader through the API.
How do you build the connection-token endpoint?
Expose one authenticated backend route that creates a ConnectionToken with your secret key and returns its secret, nothing more. For a single Stripe account (no Connect) it’s a few lines:
// POST /api/terminal/connection-token   (single account)
import Stripe from "stripe";
const stripe = new Stripe(process.env.STRIPE_SECRET_KEY);

app.post("/api/terminal/connection-token", requireAuth, async (req, res) => {
  // requireAuth has already established who is calling.
  const token = await stripe.terminal.connectionTokens.create();
  res.json({ secret: token.secret });
});
That’s the whole single-account pattern, and where most walkthroughs stop. The important discipline even here: return only the secret, require authentication, and never run the route unauthenticated. The interesting part for a SaaS platform is when the same endpoint has to serve many merchants.
How do you issue connection tokens per tenant on a Connect platform?
Resolve the tenant from the authenticated session, then create the token in the account that owns that tenant’s readers, scoped to the tenant’s Location. Which account that is depends on your charge type (Use Terminal with Connect):
- Direct charges: Locations and readers belong to the connected account, so you create the token with your platform key and the
Stripe-Accountheader set to the merchant’s account. A token created without the header can’t see that merchant’s readers. - Destination charges: Locations and readers belong to your platform, so you create the token with your platform key and no
Stripe-Accountheader. Thelocationscope is then the main thing keeping one tenant’s app away from another tenant’s readers.
The direct-charge version of the endpoint looks like this:
// POST /api/terminal/connection-token   (Connect, direct charges)
app.post("/api/terminal/connection-token", requireAuth, async (req, res) => {
  // 1. Resolve the tenant from the authenticated session, NOT from the request body.
  const tenant = await getTenantForUser(req.user);   // your own lookup
  const connectedAccountId = tenant.stripeAccountId; // acct_...
  const locationId = tenant.terminalLocationId;      // tml_...

  // 2. Create the token inside the connected account, scoped to its Location.
  const token = await stripe.terminal.connectionTokens.create(
    { location: locationId },
    { stripeAccount: connectedAccountId }            // -> Stripe-Account header
  );

  res.json({ secret: token.secret });
});
For destination charges, drop the stripeAccount option and keep the location. Two things make either version safe: the account and Location come from your own tenant record, never from a value the client sends, and every token is Location-scoped.
How does single-account token issuance differ from Connect?
| Concern | Single Stripe account | Connect: direct charges | Connect: destination charges |
|---|---|---|---|
| Who owns the readers | You | Each connected account | Your platform |
| How the token is created | connectionTokens.create() | create({location}, {stripeAccount}) | create({location}) |
| Tenant isolation | Not applicable | Stripe-Account header + location | location scope + server-side checks |
| Where the PaymentIntent lives | Your account | The connected account | Your platform, with transfer_data[destination] |
| Endpoint auth | Authenticate the user | Authenticate the user and bind them to one tenant | Authenticate the user and bind them to one tenant |
How does location scoping isolate one tenant’s readers?
The location parameter restricts a connection token to readers assigned to that Location, so a token minted for tenant A’s Location can’t be used with tenant B’s reader. If you omit it, the token works with every reader on the account.
Readers are registered to a Terminal.Location, and Locations belong to whichever account created them. On a direct-charge platform, Location scoping adds a second boundary on top of the Stripe-Account header: within a merchant with several branches, the downtown token won’t work with the warehouse reader. On a destination-charge platform, where every tenant’s readers sit on your account, it’s the primary boundary. Map each tenant (and each branch, if relevant) to its own Location, store the tml_... ID on the tenant record, and pass it on every token request.
One caveat from Stripe’s API reference: Location scoping only applies to internet-connected readers. For Bluetooth readers like the M2 and for Tap to Pay, the reader pairs with one device, so your server-side checks on the tenant and the PaymentIntent are what enforce the boundary.
Running in-person payments for WooCommerce stores? Jovvie runs on Stripe Terminal readers and Tap to Pay out of the box.
How do merchants get connected to your platform: onboarding or OAuth?
For a new platform, create connected accounts and onboard them with Stripe’s hosted onboarding; OAuth is for connecting merchants who already run their own Stripe accounts, and Stripe no longer recommends it for new Connect platforms. Either way, you end up with the merchant’s acct_... ID on your tenant record, which is what you pass as Stripe-Account on direct charges.
Stripe’s OAuth page says plainly that OAuth isn’t recommended for new Connect platforms and points to Connect Onboarding for Standard accounts instead (Using OAuth with Standard accounts). Two more limits matter: since June 2021, platforms using OAuth with read_write scope can’t connect Standard accounts controlled by another platform, and OAuth requires the Accounts v1 API, while Stripe recommends Accounts v2 for new platforms (Connect and the Accounts v2 API).
How does the OAuth flow work if you use it?
It’s a standard authorization-code exchange that runs once per merchant:
- Redirect the merchant to Stripe’s authorize URL with your
client_id,response_type=code,scope=read_write(platforms must request it), and astatevalue for CSRF protection. - Stripe sends the merchant back to your redirect URI with a short-lived, single-use
codeand yourstate; verifystatebefore continuing. - Exchange the code at Stripe’s token endpoint with your secret key; the response includes
stripe_user_id, the merchant’s account ID (OAuth reference). - Store
stripe_user_idon the tenant record. It’s the value your token endpoint passes asStripe-Account. - Listen for
account.application.deauthorizedso you clean up when a merchant disconnects your platform.
The detail that trips up nearly every platform: the Client ID is per mode. Each client_id is either live or test, and Stripe’s Terminal Connect guide says you must authorize the connected account separately for live mode and sandboxes. Authorize a merchant in a sandbox, then try to mint a live connection token for that account, and you’ll get a confusing “no such account” or permissions error. Keep live Client ID + live secret key and sandbox Client ID + test key as separate configurations, and never let a code path mix them.
How does token refresh work through the token provider?
Automatically. You register a token-provider callback with the SDK, and whenever the SDK needs to authenticate with Stripe or connect to a reader, it calls the callback, which fetches a fresh token from your endpoint. If your backend can’t return one, connecting fails with your server’s error.
In the JavaScript SDK the provider is the onFetchConnectionToken function passed to StripeTerminal.create(); on iOS and Android it’s the ConnectionTokenProvider you give the SDK, with a fetchConnectionToken method; in React Native it’s the tokenProvider on StripeTerminalProvider (Set up your integration). The browser version:
// Client side: wire the provider to your authenticated endpoint.
const terminal = StripeTerminal.create({
  onFetchConnectionToken: async () => {
    const res = await fetch("/api/terminal/connection-token", {
      method: "POST",
      credentials: "include",            // send the session cookie
      headers: { "X-CSRF-Token": csrfToken },
    });
    if (!res.ok) throw new Error("Failed to fetch connection token");
    const { secret } = await res.json();
    return secret;                        // always fresh, never cached
  },
  onUnexpectedReaderDisconnect: handleDisconnect,
});
Fetching on every call is what makes the “never cache” rule easy to follow. The anti-pattern is memoizing the token in a variable or localStorage to save a round trip, which brings back the stale-credential failures the design avoids.
How do you secure the connection-token endpoint?
Authenticate every caller, protect against CSRF, and derive the tenant from the authenticated session so a caller can only ever get a token for the merchant they’re allowed to act for. Stripe’s own setup guide tells you to authenticate this endpoint and protect it from cross-site request forgery.
- Authenticate the request. The endpoint mints a credential that can take payments; it must require a valid session or bearer token.
- Derive the tenant server-side. The account ID and Location come from your own tenant lookup keyed on the authenticated user. Accept
stripeAccountorlocationfrom the request body and a caller can request tokens for any merchant you’ve connected: a cross-tenant escalation. This is the most important rule in the whole pattern. - Add CSRF protection. Because the browser sends a session cookie, the POST needs a CSRF token or an equivalent same-site control so another site can’t trigger token minting for a logged-in user.
With those three in place, the worst a compromised client can do is get a token for its own merchant’s own readers, which is the blast radius you want. The fee mechanics that ride on the same connected accounts are in the Connect for Terminal platforms guide, and the charge-type decision is in Stripe Connect vs direct API for Terminal.
What does the end-to-end flow look like?
Here’s the whole architecture for a direct-charge platform, from onboarding a merchant to a card being tapped:
- Onboard the merchant with Stripe’s hosted onboarding (or OAuth, per mode, for existing Stripe accounts) and store the
acct_...ID on the tenant. - Create a Location and register the merchant’s readers with the
Stripe-Accountheader, and store thetml_...ID on the tenant. - The client loads the SDK and registers a token provider pointed at your authenticated endpoint.
- The SDK needs to connect a reader and calls the provider.
- The provider POSTs to your endpoint with the session cookie and CSRF token.
- The endpoint authenticates the caller and resolves the tenant server-side.
- The endpoint creates the token with the
Stripe-Accountheader andlocation, and returns only the secret. - The SDK connects to the reader and collects the payment on a PaymentIntent created on the connected account.
- Next time, the provider fetches a fresh token. No caching, no manual expiry handling.
On a destination-charge platform, steps 2 and 7 run on your platform account without the header, and the PaymentIntent carries transfer_data[destination] and your application fee. For the client-surface decision above this, see mobile vs web SDK for Stripe Terminal in SaaS.
Frequently asked questions
What is a Stripe Terminal connection token?
It’s a short-lived credential your backend creates with your secret key and returns to the Terminal SDK so it can connect to readers and take in-person payments. It must be created server-side from an authenticated endpoint, and the client only ever receives its secret.
Can I cache or reuse a Stripe connection token?
No. Stripe says not to cache or hardcode connection tokens; the SDK manages their lifecycle and asks your token provider for a new one whenever it needs to connect. Always fetch a fresh token from your endpoint.
How do I create a connection token for a Connect connected account?
With direct charges, create it with your platform key and the Stripe-Account header set to the merchant’s account (the stripeAccount option in Stripe’s libraries), plus a location. With destination charges, readers live on your platform, so create the token on the platform without the header and scope it to the tenant’s Location.
How do I restrict which readers a connection token can use?
Pass a location when you create the token; it then works only with readers assigned to that Location. Without a location it works with every reader on the account. Location scoping applies to internet-connected readers only.
Should a new platform use Stripe Connect OAuth?
Stripe doesn’t recommend OAuth for new Connect platforms; it recommends Stripe-hosted onboarding instead. OAuth also requires Accounts v1 and can’t connect Standard accounts controlled by another platform. Use it only to connect merchants who already run their own Stripe accounts.
Why does my live connection token fail after authorizing in test mode?
Because Connect OAuth Client IDs are per mode: an account authorized with your sandbox Client ID isn’t authorized in live mode. Run the authorization again with your live Client ID and live secret key, and keep the two configurations strictly separate.
Want your token and onboarding architecture reviewed?
Token issuance, tenant isolation and live-vs-sandbox wiring are cheap to fix before launch and painful after. Talk to a Jovvie advisor and we’ll pressure-test your design. If your merchants sell through WooCommerce, a POS for Stripe like Jovvie handles the in-person side.
Sources: Create a connection token · Use Terminal with Connect · Set up your integration: JavaScript · Using OAuth with Standard accounts · OAuth reference · Connect and the Accounts v2 API.
