
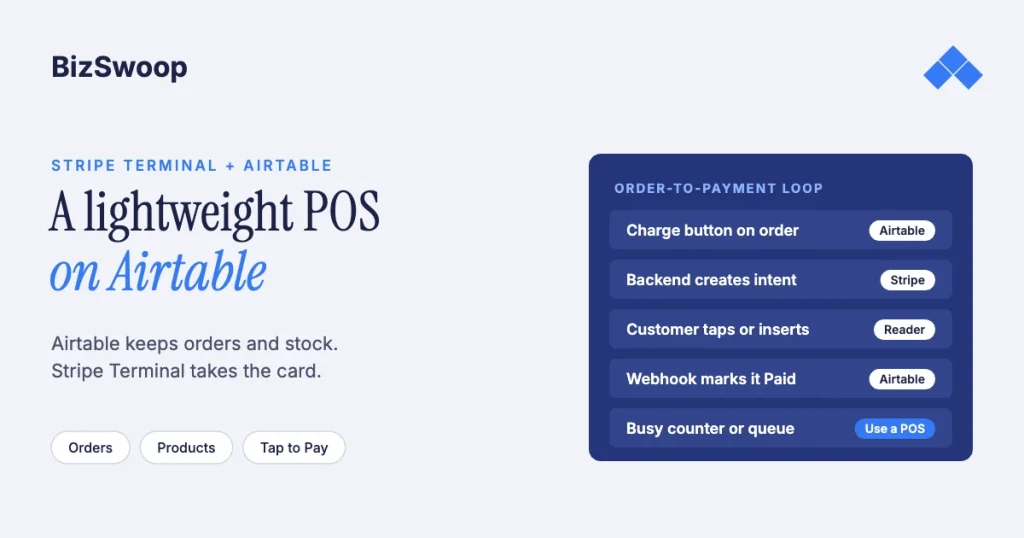
Yes, a small business can run a lightweight card-present POS on Airtable and Stripe Terminal. Airtable holds the products and orders; Stripe Terminal takes the card on a reader or with Tap to Pay; a small backend connects them. An Airtable button or automation asks the backend to create a Stripe PaymentIntent, the customer pays on the reader or phone, and a Stripe webhook writes the result back to the Airtable order. It suits market stalls, pop-ups and low-volume showrooms, not a busy counter.
Jovvie, an official Stripe Partner, has built in-person Stripe Terminal payments for WooCommerce merchants since 2016. The Airtable and Stripe details below were re-checked against both vendors’ documentation in November 2026. This is the low-code piece in the SaaS pillar, Stripe Terminal beyond POS: embedding card-present payments into SaaS platforms. If Airtable turns out to be the wrong tool for your volume, the last section says so.
Key Takeaways
- Airtable is the order book, Stripe Terminal is the register. Airtable stores products, orders and stock; Stripe Terminal accepts the card.
- There’s no native Airtable integration for card readers. Airtable’s Stripe listing works through Zapier and covers online payment data, so card-present needs your own backend.
- Tap to Pay is the cheapest start, but it needs a mobile app. A smart reader such as the S700 can instead be driven from your backend with no app.
- The webhook, not the button, decides if an order is paid. Write payment status to Airtable only from
payment_intent.succeededand related events. - Respect Airtable’s API limit. It’s 5 requests per second per base, and going over means a 429 and a 30-second wait.
- Move to a real POS when volume grows. A queue, offline selling or dozens of sales an hour outgrow this pattern.
Can you run a real POS on Airtable + Stripe Terminal?
Yes, for low-volume, low-SKU operations where every sale doesn’t need to be instant or offline. A POS does two jobs: it’s a record of products, prices and orders, and it’s a fast payment register with a card reader. Airtable is good at the first and can’t do the second. It has no register screen, no reader driver, and an API limited to 5 requests per second per base. It does have buttons, automations and an API, which are enough to start a Stripe payment and record its result.
So the pattern is “Airtable as the order book, Stripe Terminal as the register.” For a farmers-market vendor selling 40 items a day, a maker at craft fairs or a showroom taking the occasional deposit, that’s enough, and far less work than a full commerce platform.
What is the simplest way to accept card payments from Airtable?
Tap to Pay, because it turns a phone into the reader with no hardware to buy. Stripe’s Tap to Pay on iPhone and Android accepts contactless cards, Apple Pay and Google Pay on a supported phone; Stripe adds 10¢ per Tap to Pay authorization in the US. The catch is that Tap to Pay runs inside a mobile app built with Stripe’s iOS, Android or React Native Terminal SDK, so an Airtable button alone can’t drive it. You need a small app that talks to your backend.
If you’d rather not build an app, use a smart reader. The Stripe Reader S700 or S710 ($299 each in the US) connects over the internet, and with the server-driven integration your backend sends the payment straight to it. The cheaper Stripe Reader M2 ($59) is a Bluetooth reader that needs a mobile app, like Tap to Pay. The Stripe Terminal hardware guide compares the devices.
How does the Airtable + Stripe Terminal architecture work?
Four parts: your Airtable base (products and orders), a small backend (a serverless function, or a tool like Make or n8n calling the Stripe API), the reader or Tap to Pay phone, and Stripe, which holds the PaymentIntent and sends webhooks. Airtable never sees a card number, and Stripe never owns your catalog.
| Step | Where | What happens |
|---|---|---|
| 1. Trigger | Airtable | A “Charge order” button or an automation calls the backend with the record ID and total |
| 2. Create | Backend → Stripe | The backend creates a PaymentIntent with the Airtable record ID in metadata |
| 3. Collect | Reader or phone | The backend sends the payment to a smart reader, or the Tap to Pay app collects it; the customer taps or inserts |
| 4. Confirm | Stripe → backend | Stripe sends payment_intent.succeeded (or a failure) to your webhook endpoint |
| 5. Record | Backend → Airtable | The backend sets the order to Paid with the charge ID, card brand, last four digits and time, and decrements stock |
Card data stays between the reader and Stripe. Airtable stores an order ID and an amount, which keeps your base out of the card-handling part of PCI scope.
How do you build it, step by step?
- Model the base. A Products table (name, price, SKU, stock) and an Orders table (line items, total, status, PaymentIntent ID, charge ID, card brand, last four, paid at). Status starts as Open.
- Add a charge trigger. A button field, or an automation that fires when status changes to Ready to charge, calls your backend with the record ID and total.
- Create the PaymentIntent. The backend creates it for the total with
card_presentas the payment method type and the Airtable record ID inmetadata, then saves the PaymentIntent ID to the order straight away. - Collect. Send the PaymentIntent to the smart reader, or hand it to the Tap to Pay app, which uses a connection token from your backend. The customer taps, inserts or swipes.
- Capture. Use automatic capture for a normal sale. For deposits or charge-later flows, use manual capture and capture within Stripe’s window.
- Write the result back. On
payment_intent.succeeded, find the record from the metadata, set status to Paid, store the payment details and decrement stock. - Handle failures. On
payment_intent.payment_failed, set the order to Declined and offer a retry. Never leave an order stuck at Ready to charge.
Outgrowing Airtable at the counter? Jovvie is a WooCommerce POS that runs on Stripe Terminal readers and Tap to Pay.
How do you keep orders, payments and refunds consistent in Airtable?
Use the PaymentIntent as the idempotency anchor, let webhooks be the only source of payment status, write refunds and disputes back explicitly, and stay under Airtable’s rate limit.
- One PaymentIntent per order, saved before you collect. If someone taps Charge twice, the backend sees the saved PaymentIntent ID and reuses it. Send an idempotency key on the create call so a retried request can’t create a second payment.
- Webhooks are the source of truth. The button starts the payment but doesn’t know how it ended. Only your webhook handler should set payment status; marking an order Paid when the button fires means your order book lies when a card declines.
- Write refunds and disputes back. A refund issued in the Stripe Dashboard doesn’t update Airtable. Listen for
charge.refundedandcharge.dispute.createdand set Refunded, Partially refunded or Disputed on the order. - Stay under 5 requests per second. A handler that updates the order, three stock rows and a log can burst past the limit and lock the base for 30 seconds. Update up to 10 records per request, and queue webhook work so a busy afternoon doesn’t stall a sale.
When should you move from Airtable to a purpose-built POS?
When you need speed, offline selling or volume: more than a few dozen sales an hour, a queue of customers, or selling where the connection drops.
| Limitation | What it means at the counter | OK for a lightweight setup? |
|---|---|---|
| No register screen | Grids and forms are slow under time pressure | Fine at low volume; painful with a line |
| 5 requests per second per base | Bursts of order and stock writes hit a 429 and a 30-second wait | OK for dozens of sales a day with batching |
| No offline mode | No connection means no order writes | Risky outdoors; a real POS keeps selling offline |
| Latency | API round trips add seconds | Fine for unhurried sales, not a busy café |
| Not transactional | Simultaneous edits can collide | Manage with idempotency and one webhook writer |
| No built-in receipts, tax or tips | You build them yourself | Doable, but it’s real work |
If in-person payment is an occasional part of a small business and your catalog lives in Airtable, this setup is a legitimate low-cost way to go card-present. If in-person selling is the core of the business, you’ve outgrown it. For WooCommerce stores, a POS for Stripe like Jovvie gives you Terminal as a real register, with receipts, inventory and offline handling built in. The monday.com + Stripe Terminal guide applies the same pattern to service jobs.
Frequently asked questions
Can Airtable process payments?
Not on its own. Airtable is a database with automations. It can start and record a payment by calling Stripe from a button, automation or backend, and its Stripe listing connects through Zapier for online payment data. To accept a physical card you need Stripe Terminal, a reader or Tap to Pay, with Airtable storing the result.
Can you build a POS with Airtable?
You can build a lightweight order book and catalog in Airtable and pair it with Stripe Terminal for card payments. It works for low-volume, low-SKU sales such as market stalls and pop-ups. It has no register screen, no offline mode and a 5-requests-per-second API limit, so it doesn’t suit a busy store.
Does Airtable integrate with Stripe Terminal?
Not directly; there’s no native connector. A small backend, or a tool like Make or n8n, creates the PaymentIntent, sends it to the reader or Tap to Pay app, and writes the result back to Airtable when Stripe’s webhook arrives.
Can Airtable connect to a card reader?
No. The reader is controlled by your backend (smart readers, server-driven) or by a mobile app using Stripe’s Terminal SDK (Tap to Pay, Bluetooth readers). Airtable triggers the payment and stores the outcome.
What does it cost to accept card payments from Airtable with Stripe Terminal?
Stripe Terminal’s US in-person rate is 2.7% + 5¢ per successful payment, plus 1.5% for international cards and 10¢ per Tap to Pay authorization. Tap to Pay needs no hardware; a Stripe Reader M2 is $59 and an S700 or S710 is $299. Add your Airtable plan and whatever your backend runs on.
Thinking about an Airtable + Stripe Terminal build?
Bring your catalog and your expected volume, and we’ll tell you whether Airtable is enough or whether you should start on a purpose-built POS.
Sources: Airtable API rate limits · Airtable + Stripe integration · Collect card payments · Tap to Pay · Server-driven integration · Connection tokens API · Stripe webhooks · Idempotent requests · Stripe Terminal pricing.
