
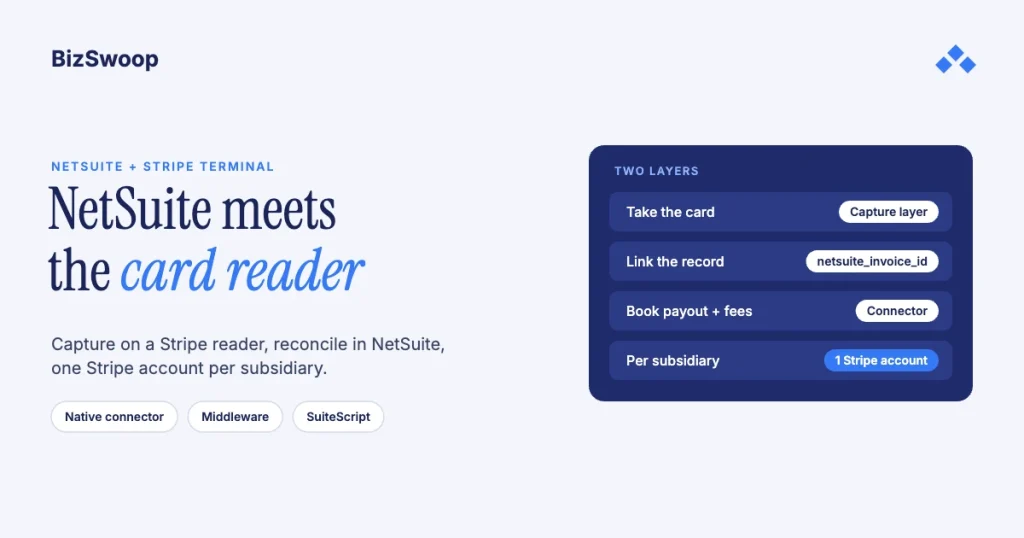
To connect NetSuite to Stripe Terminal, you build a card-present capture layer and let a reconciliation layer land the money in NetSuite. The capture layer takes the card on a reader: a backend creates the PaymentIntent for a NetSuite sales order or invoice and drives the reader through a Terminal SDK or Stripe’s server-driven integration. The reconciliation layer records the payment, fees and payout in NetSuite; Stripe’s Connector for NetSuite reconciles any Stripe charge, including Terminal ones, but it doesn’t drive a reader. How you split that work gives you one of three patterns (native connector, middleware, or SuiteScript custom), and the right one depends on how many subsidiaries you run and how much of the flow you need to own.
Jovvie, an official Stripe Partner, has built in-person Stripe Terminal payments for WooCommerce merchants since 2016. Every Stripe and connector mechanic below was re-checked against Stripe’s documentation in November 2026. This is a cluster piece under the Stripe Terminal ERP integration patterns guide; if you’re deciding whether to buy a connector or build your own, see Build vs Buy: Stripe Terminal ERP Connectors.
Key Takeaways
- Capture and reconciliation are separate jobs. Taking a card on a reader is a Terminal integration; recording it correctly in NetSuite is a reconciliation integration.
- Stripe’s NetSuite connector reconciles Terminal charges too. It syncs any Stripe charge, refund, dispute and payout, but it doesn’t issue connection tokens, connect readers or create PaymentIntents.
- Link payments with the connector’s metadata keys. Put
netsuite_invoice_idornetsuite_customer_idon the charge so the connector applies the payment to the right NetSuite record. - One Stripe account per subsidiary. Stripe’s connector can’t map one Stripe account to several NetSuite subsidiaries, so each subsidiary transacting on Stripe needs its own account.
- Capture is the source of truth. Never make a successful card payment depend on a synchronous NetSuite write; post back from an idempotent, retryable job.
- Three patterns, one flow. Native connector, middleware and SuiteScript custom all run the same sequence; they differ in where it runs and who owns it.
How do you integrate NetSuite with Stripe Terminal?
You pick one of three architectures (native connector plus a capture app, middleware, or SuiteScript custom) and run a card-present capture flow on top, because NetSuite has no built-in card reader support and Stripe’s connector handles reconciliation, not in-person capture.
Ask two questions in order. First: do you only need to reconcile Stripe payments into NetSuite, or do you need to take a card in person? If you take cards in person, you need a capture layer whichever pattern you pick. Second: how many subsidiaries, and how much customization? A single-subsidiary business that wants a fast path chooses differently from a NetSuite OneWorld company with several subsidiaries and custom posting rules.
| Pattern | Best fit | Card-present capture | Customization ceiling | Build and run effort |
|---|---|---|---|---|
| Native connector (Stripe Connector for NetSuite plus a capture app) | Standard AR; wants a supported product doing reconciliation | A capture app creates the PaymentIntent with NetSuite metadata; the connector reconciles it | Low to medium (the connector has fixed conventions) | Low to stand up; ongoing vendor dependency |
| Middleware / iPaaS (a broker between Stripe and NetSuite) | Several systems in play; no deep SuiteScript team | The broker issues connection tokens or drives smart readers, then posts to NetSuite | Medium (mapping logic lives in the broker) | Medium; recurring platform fee |
| SuiteScript custom (built inside NetSuite against Stripe’s API) | OneWorld companies; heavy customization; full control | A RESTlet or Suitelet backend drives capture and posts back | High (you own everything) | High to build; no third-party broker |
What does the Stripe Connector for NetSuite cover, and what doesn’t it?
The connector reconciles Stripe activity into NetSuite, including card-present charges your own Terminal integration creates, but it doesn’t take the card: tokens, readers and PaymentIntents are your capture layer’s job.
This is the distinction that sinks projects when it’s blurred, so here is the clean split:
- What the connector covers. Stripe says the Connector for NetSuite automates reconciliation for any charges or payments processed by Stripe. It creates a customer payment for each charge, applies it to an invoice where it can, and after two days creates the bank deposit with fees, refunds, disputes and payouts broken out. Payments from “third-party or in-house systems”, which includes your Terminal app, are linked through metadata keys such as
netsuite_invoice_idandnetsuite_customer_id, and Stripe’s Payment Linker add-on can record them as customer deposits applied to sales orders. - What the connector doesn’t cover. It doesn’t create connection tokens, discover or connect readers, or create the PaymentIntent that a tap or chip insert completes. Those belong to a Terminal SDK or Stripe’s server-driven integration, wired to NetSuite by you.
- One caveat on AR. Stripe notes that a charge that isn’t applied to an invoice credits accounts receivable without a matching debit, so either create the NetSuite invoice first or plan a journal entry for over-the-counter sales.
So a realistic deployment is two integrations working together: a capture layer that takes the card and a reconciliation layer (often the connector) that books it. The connector is sold and implemented through Stripe and its partners rather than self-installed; Stripe’s free self-serve version only adds payment links and doesn’t sync payments.
Can NetSuite be used as a point of sale?
Yes, with a capture layer in front. NetSuite is a system of record, not a POS, but a Suitelet screen, a companion mobile app or a middleware POS can create the order in NetSuite, take the card on a Stripe reader and post the payment back. NetSuite supplies customer, item, pricing and inventory data; Stripe Terminal supplies the card-present rail.
What are the three NetSuite + Stripe Terminal architecture patterns?
Every build we’ve scoped resolves to one of three patterns, or a hybrid of two, distinguished by where the capture logic runs and how tightly it couples to NetSuite.
Pattern 1: Native connector plus a capture app
You use the Stripe Connector for NetSuite for reconciliation and add a small Terminal capture app that creates the PaymentIntent with NetSuite metadata on it; the connector then books the payment and the payout.
This is the fastest route for standard AR. The connector does the error-prone accounting (payout decomposition, fee posting, refund and dispute handling), and your capture app stays small: it authenticates the clerk, gets a connection token from your backend (or asks the backend to drive a smart reader), takes the payment and sets netsuite_invoice_id or netsuite_customer_id. The trade-off is the connector’s fixed conventions. Choose this when you want a supported product doing reconciliation and can live with how it maps records.
Pattern 2: Middleware / iPaaS
A broker between Stripe and NetSuite runs the whole flow: it issues connection tokens or drives smart readers, receives Terminal payment webhooks, and writes customer payments or deposits into NetSuite through its APIs.
This suits companies with several systems (Stripe, NetSuite, a CRM or order system) and teams that prefer mapping logic in a broker over SuiteScript. You get near-real-time sync and one place to manage retries and idempotency. The costs are a recurring platform fee and one more system in the failure path; you now own what happens when Stripe succeeds but the NetSuite write is delayed.
Pattern 3: SuiteScript custom
You build inside NetSuite: a RESTlet or Suitelet backend calls Stripe’s API to create connection tokens or drive a smart reader directly, creates the PaymentIntent against the sales order, and posts the payment back.
This is the enterprise pattern and where OneWorld companies with per-subsidiary Stripe accounts usually land. It gives full control of the accounting boundary: when the payment crosses over, which identifier carries across, and how failures are handled, all within NetSuite’s own permissions and audit model (see the Oracle NetSuite documentation). Stripe’s server-driven integration fits well here because the backend controls smart readers over the API with no client SDK, though it doesn’t support offline payments or Bluetooth readers. The cost is real engineering: SuiteScript development, sandbox testing and owning every edge case.
What is the card-present payment flow, step by step?
Whatever the pattern, a NetSuite + Stripe Terminal payment follows the same sequence: create the order in NetSuite, connect the reader securely, create and collect the PaymentIntent, then record the payment back in NetSuite.
- Create or open the sales order or invoice in NetSuite. The clerk picks the customer and items; NetSuite works out pricing, tax and subsidiary. Its internal ID is what the two systems agree on.
- Connect the reader. With an SDK, your backend creates a short-lived connection token with your secret key and returns only the token to the device, which uses it to connect a reader (S700, S710, T600, WisePOS E or M2 in the US, or Tap to Pay). With the server-driven integration, the backend sends the payment straight to a registered smart reader.
- Create a PaymentIntent for the amount, with the NetSuite internal ID in metadata (
netsuite_invoice_idif you use the connector), and collect the payment method on the reader. - Confirm the payment. The customer taps or inserts the card; Stripe processes it and the PaymentIntent succeeds. In-person PaymentIntents often use manual capture, so make sure your flow captures before the authorization expires.
- Record it in NetSuite. The connector creates the customer payment and applies it; in a custom build, your post-back writes the customer payment or deposit applied to the order and stores the Stripe charge ID.
- Reconcile the payout. When Stripe pays out, the connector (or your own job) creates the bank deposit, matches it to the payments and books fees.
The two disciplined choices are the metadata in step 3 and the Stripe ID stored in step 5: with both in place, every later reconciliation is a lookup, not a guess.
How should you handle connection tokens in a NetSuite build?
Create them server-side from an authenticated endpoint (a RESTlet, a middleware route or your app’s backend) and return only the token to the device, so the secret key never leaves the server.
Stripe’s connection token API is clear that tokens come from your backend. Enforce three properties: the endpoint itself requires a signed-in user; you fetch a fresh token every time the SDK asks rather than caching one; and you create the token on the right subsidiary’s Stripe account and scope it to that site’s Terminal Location, because a token from the wrong account connects the reader to the wrong ledger. For multi-tenant designs, see connection token patterns for SaaS embeds.
Running in-person payments for WooCommerce stores? Jovvie runs on Stripe Terminal readers and Tap to Pay out of the box.
How do you handle OneWorld subsidiaries and multiple Stripe accounts?
Give each subsidiary that transacts on Stripe its own Stripe account and resolve the right account at payment time, so payments, fees and payouts land in the correct legal entity.
Stripe’s multiple-subsidiaries guidance is direct: the connector supports one Stripe account per subsidiary by default, you can’t use one Stripe account with several subsidiaries, and Stripe reports each account’s transactions as a single entity. For card-present payments that means:
- Map subsidiary to Stripe account. Store which Stripe account belongs to each subsidiary (for example in a custom field or a configuration record) and look it up from the order’s subsidiary.
- Assign readers to the right account and Location. A reader at a site belongs to one subsidiary’s Stripe account; mixing them is how money lands in the wrong entity.
- Post back in the transaction’s subsidiary. The integration user needs NetSuite role permissions for each subsidiary it writes to.
- Reconcile per account. Each subsidiary’s payouts reconcile to its own bank account and GL.
Get the subsidiary → Stripe account → reader mapping right up front and multi-entity becomes bookkeeping; get it wrong and you get intercompany cleanup.
How do you post Terminal payments back and reconcile payouts?
Record each payment as a customer payment (or a customer deposit on a sales order) tied to its NetSuite document, keep fees as a separate line, and clear the payout against the underlying payments.
- Customer payment or deposit. With invoicing, apply a customer payment to the invoice. Against an open sales order, a customer deposit is the usual record (the connector’s Payment Linker add-on does this). For over-the-counter sales without a receivable, create the invoice first or plan the AR entry.
- Fees. Book processing fees as their own expense line, not netted into revenue. The connector puts fees and currency conversion on the deposit record.
- Clearing to payout. Record payments into a clearing or undeposited-funds account, then clear it when the matching payout arrives.
- Currency. Keep the payment currency aligned with the subsidiary’s to avoid spurious FX lines; the connector also supports multiple currencies.
- Idempotency. Store the Stripe charge or PaymentIntent ID on the NetSuite record and enforce uniqueness so a retry never double-books.
If you run a Connect platform taking in-person payments for NetSuite-run merchants, the connector’s Connect support (public preview) adds transfer and application-fee lines to each deposit, optionally per connected account. The fee mechanics are in Stripe Terminal payouts and fee extraction.
What happens when Stripe succeeds but the NetSuite write fails?
Treat the captured payment as the source of truth, post to NetSuite from an idempotent, retryable job keyed on the Stripe ID, and reconcile any gaps against Stripe’s data.
The card has been charged and the customer has left, but the NetSuite write timed out. Don’t void the payment; the customer has their goods. Stripe is authoritative for whether money moved, and the NetSuite record must eventually be written.
- Idempotent post-back. Key every NetSuite record on the Stripe ID with a uniqueness check, so retries can never double-book.
- A durable retry queue. Queue the post-back and retry with backoff. Middleware does this natively; in SuiteScript, a scheduled script sweeps paid-but-unposted payments; with the connector, its own sync picks up the charge.
- A daily reconciliation check. Compare Stripe charges with NetSuite records and list any payment that never landed, so silent data loss becomes a visible exception.
What does a reference implementation include?
Five components: a token or reader-control service, a capture client, a post-back writer, a reconciliation job and a subsidiary-to-account resolver.
- Token or reader-control service. An authenticated endpoint that creates connection tokens, or drives smart readers server-side, on the correct subsidiary’s account.
- Capture client. The device app or POS screen that takes the payment, with the NetSuite ID in metadata.
- Post-back writer. Records the payment or deposit in NetSuite, stores the Stripe ID and enforces idempotency (or leaves this to the connector).
- Reconciliation job. The connector, or your own logic, that creates bank deposits from payouts and books fees.
- Subsidiary resolver. A lookup from order to subsidiary to Stripe account to reader and Location, used by both the token service and the post-back.
In SuiteScript custom you build all five; with middleware the broker hosts the middle three; with the native connector, the connector is your post-back and reconciliation and you build the rest thin.
Frequently asked questions
Does the Stripe Connector for NetSuite support Stripe Terminal?
It reconciles Terminal payments like any other Stripe charge: it creates the customer payment, applies it to an invoice when the charge carries the NetSuite invoice ID in metadata, and books the payout and fees. It doesn’t connect readers or create PaymentIntents, so you still need a capture layer to take the card.
Can NetSuite be used as a point of sale with Stripe Terminal?
Yes, with a capture layer in front. NetSuite supplies customers, items, pricing and inventory as the system of record; a Suitelet screen, mobile app or middleware POS creates the order, takes the card on a Stripe reader and records the payment back in NetSuite.
Does NetSuite support multiple Stripe accounts and subsidiaries?
Yes. Stripe’s connector supports one Stripe account per NetSuite subsidiary and several Stripe accounts mapped to one subsidiary, but not one Stripe account shared across subsidiaries. Map each subsidiary to its account and create connection tokens and register readers on that account.
How do I link a Terminal payment to a NetSuite invoice?
Add the connector’s metadata keys to the Stripe charge: netsuite_invoice_id applies the customer payment to that invoice, and netsuite_customer_id records it under that customer. Set them when you create the PaymentIntent so the charge carries them when it syncs.
How do I reconcile Stripe payouts in NetSuite?
Record payments into a clearing account, then create a bank deposit for each payout that matches the underlying payments and books fees separately. Stripe’s connector automates this, creating the deposit about two days after the payment; a custom build implements the same match-and-clear logic.
How should I handle Stripe Terminal connection tokens in NetSuite?
Create them server-side, from an authenticated RESTlet, middleware route or app backend, with the secret key of the correct subsidiary’s Stripe account, and return only the token. Fetch a fresh one each time the SDK asks and scope it to the site’s Terminal Location.
Scoping a NetSuite + Stripe Terminal build?
We can pressure-test the architecture against your subsidiaries and chart of accounts before any SuiteScript is written. Talk to a Jovvie advisor. If you also sell through WooCommerce, a Stripe POS like Jovvie covers the in-person side.
Sources: Stripe Connector for NetSuite · Stripe charges in NetSuite · Custom payment application · Multiple subsidiaries · Stripe payouts in NetSuite · Stripe Connect in NetSuite · Create a connection token · Oracle NetSuite documentation.
